GETTING STARTED
My Global Rescue puts vital medical, security, and rescue resources at your fingertips, anywhere in the world. Our state-of-the-art technology allows you to have face-to-face video consultations with our experts, including critical care paramedics, physicians and military special operations veterans. Using My Global Rescue app gives you 24/7 access to our global operations centers and immediate assistance with your medical and security problems.
LOGIN
Now that you have installed and opened My Global Rescue app, a login screen similar to the figure below is in front of you.
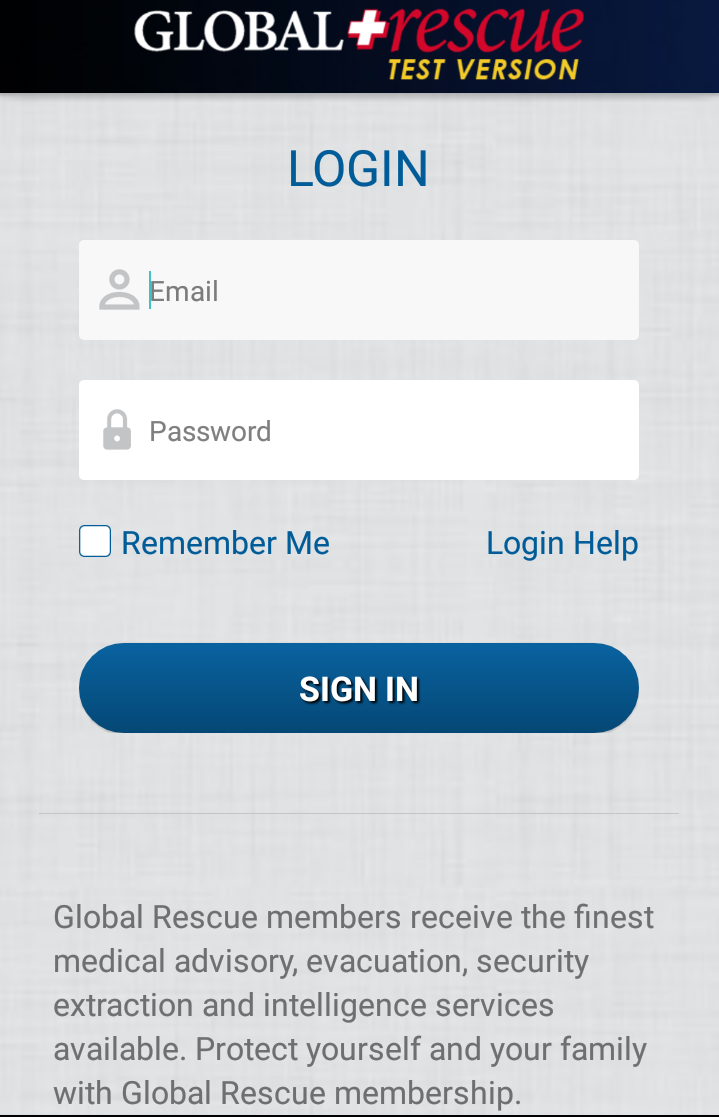
Enter your username and password and click on the sign in button. If you are logging in for the first time, you will see the following screen which consists of EULA and Privacy Policy. It prompts you to accept two policies.
- Grid Mobile Application End User License Agreement (EULA)
- Grid Mobile Application Privacy Policy
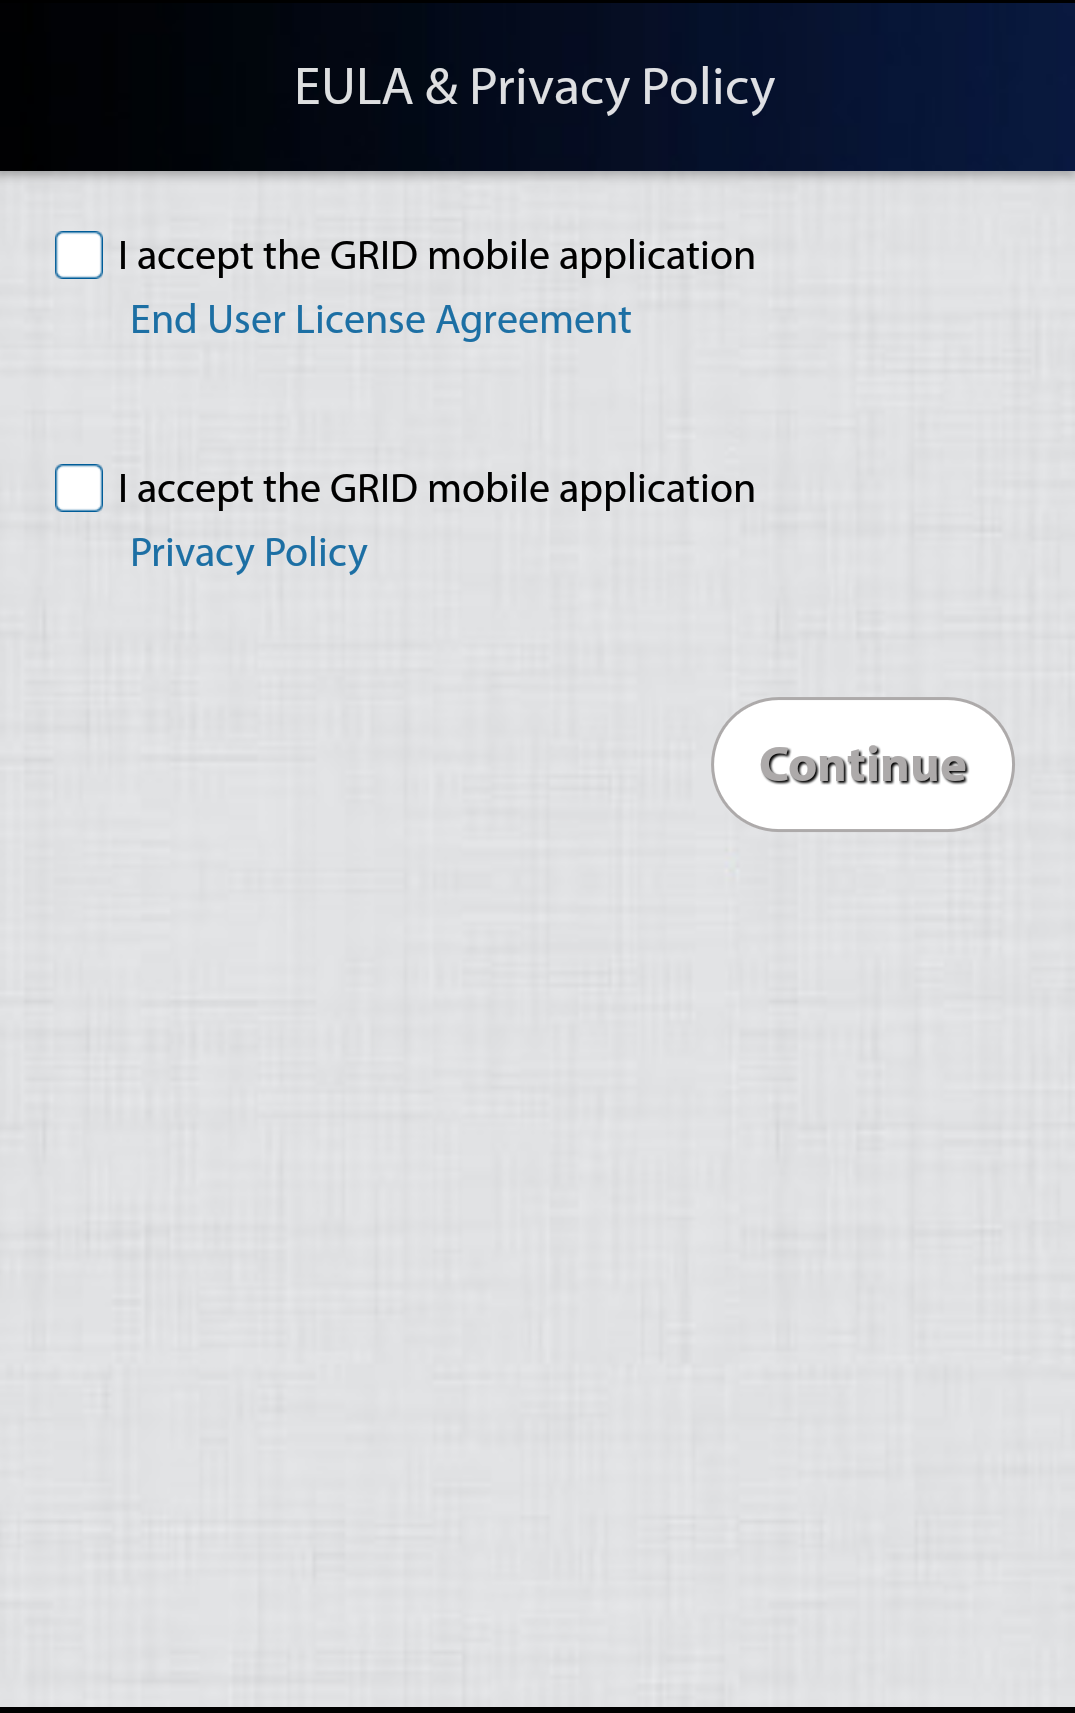
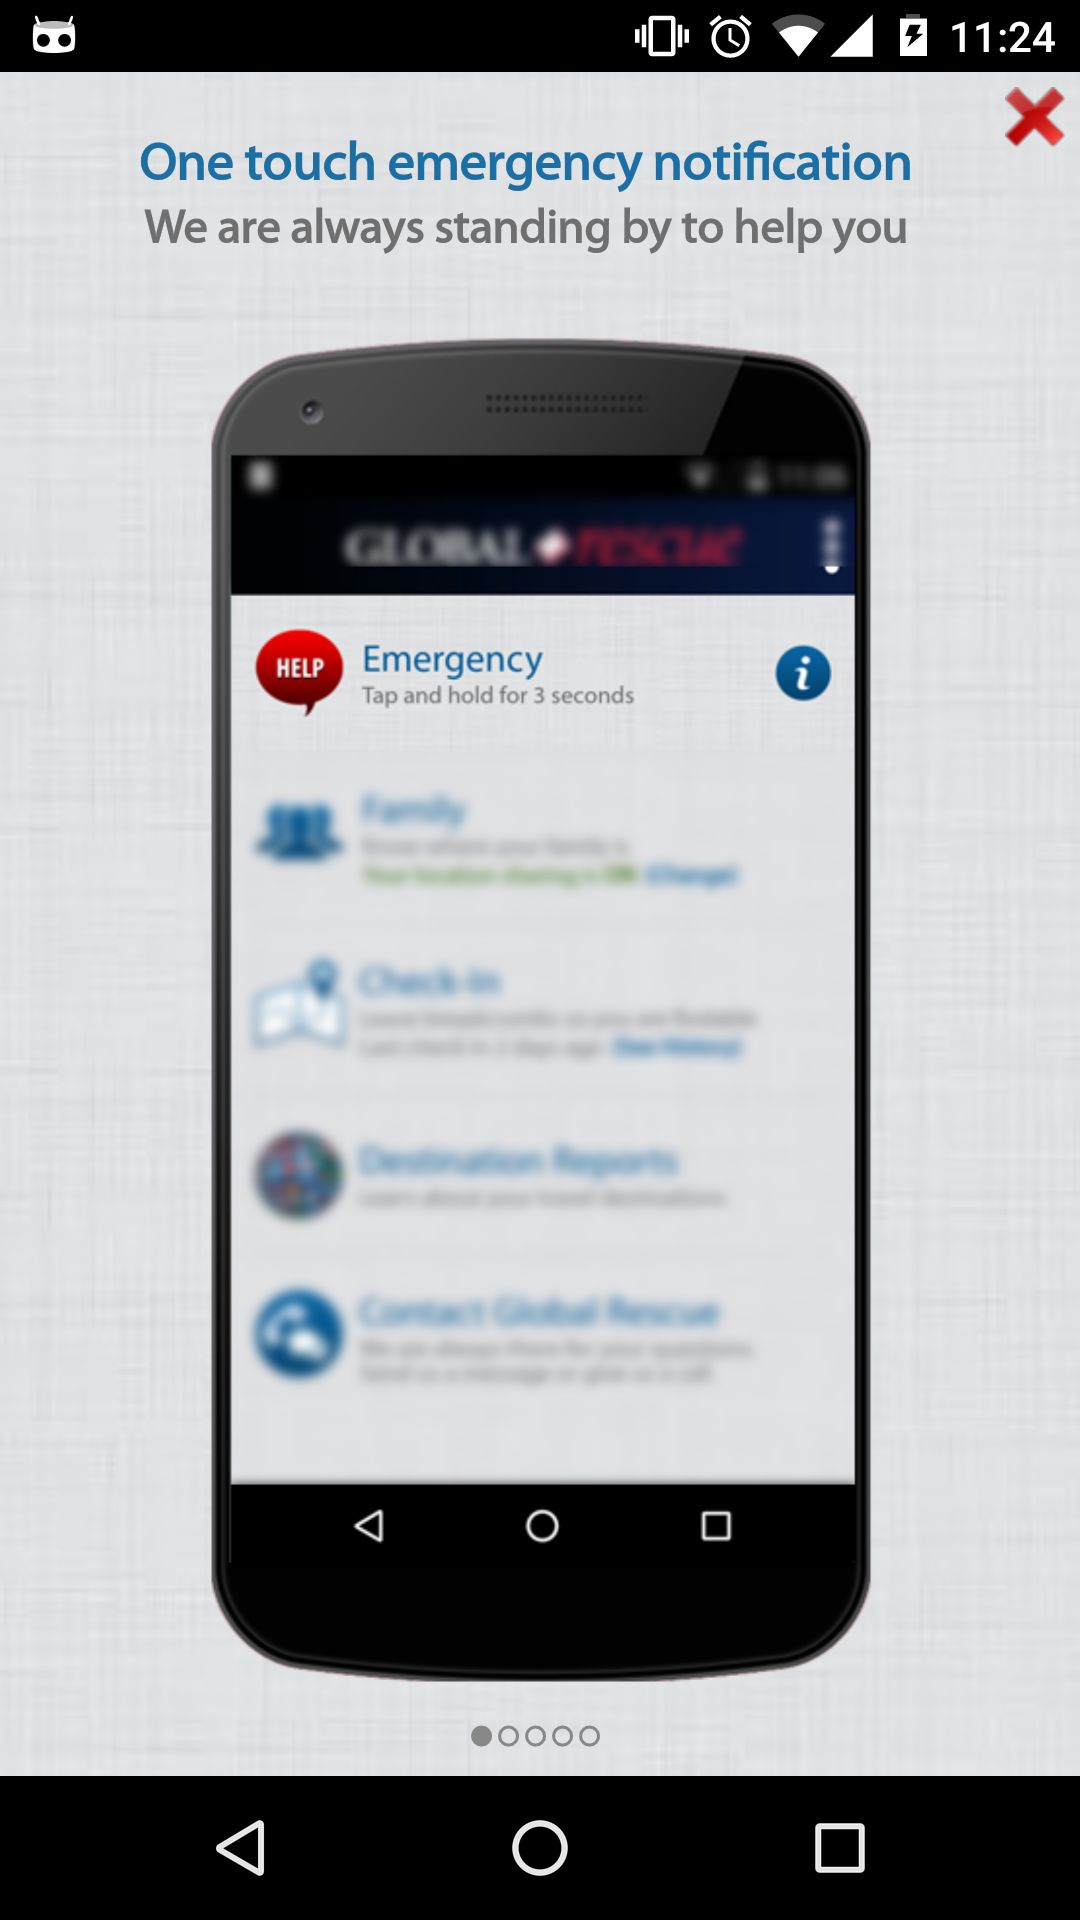
Once you have accepted these policies, a walk through screen similar to the figure below, consisting of how to use the main features of the app are shown. You can choose to skip these if you want but if you are logging in for the first time, it is advisable to have a look at the walk-through once.
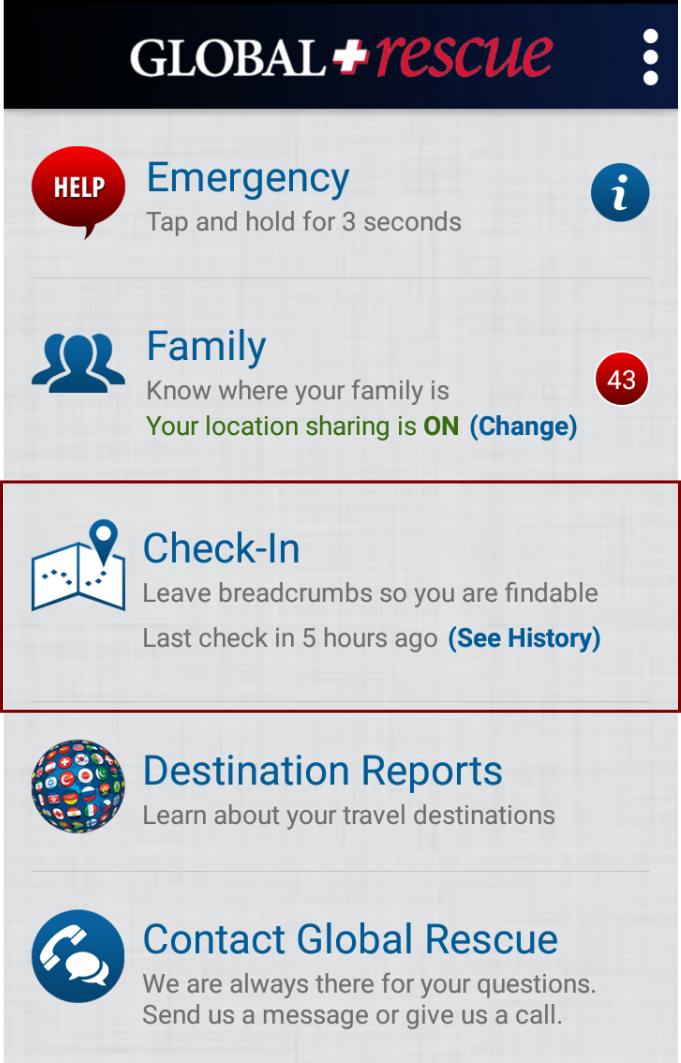
DASHBOARD
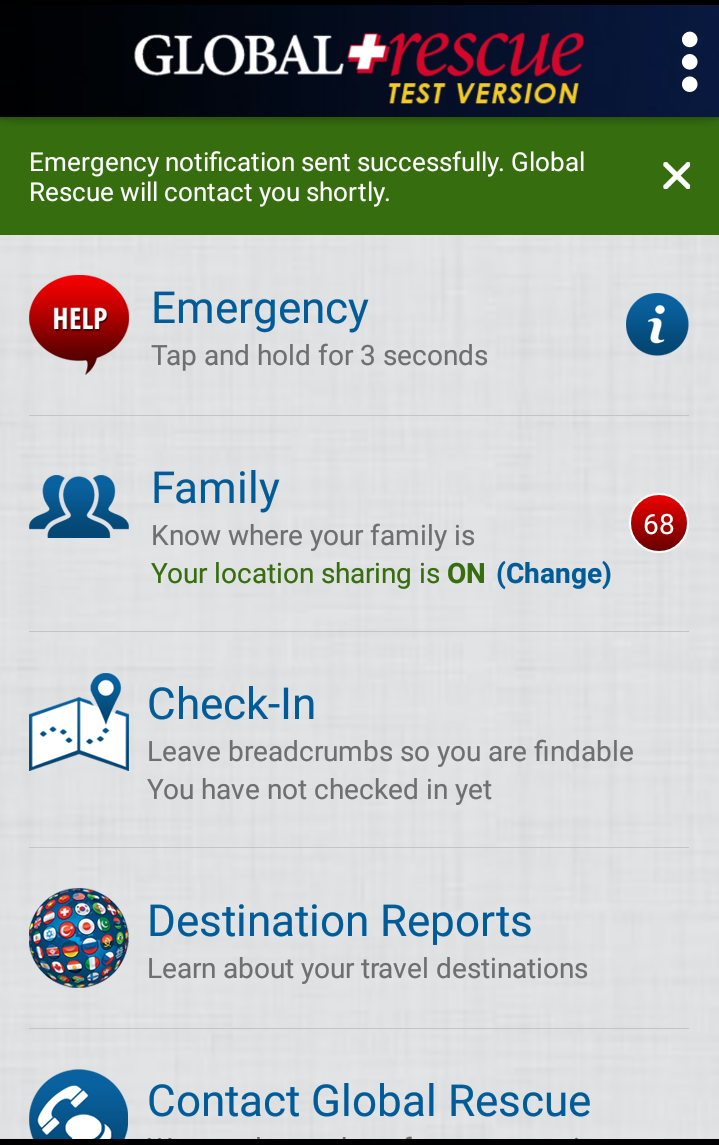
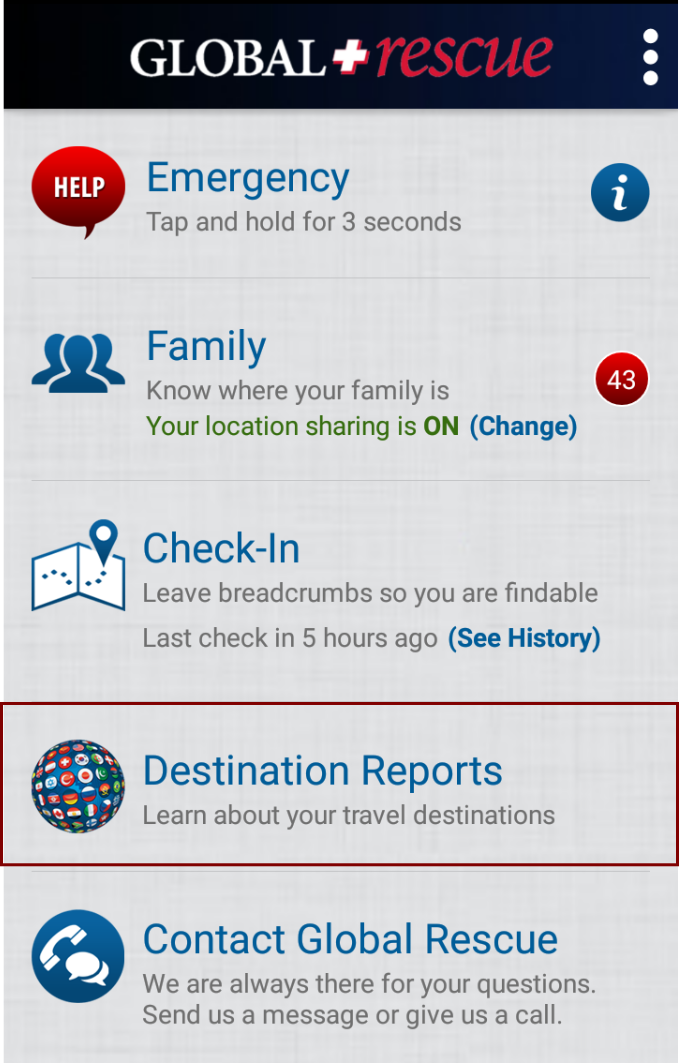
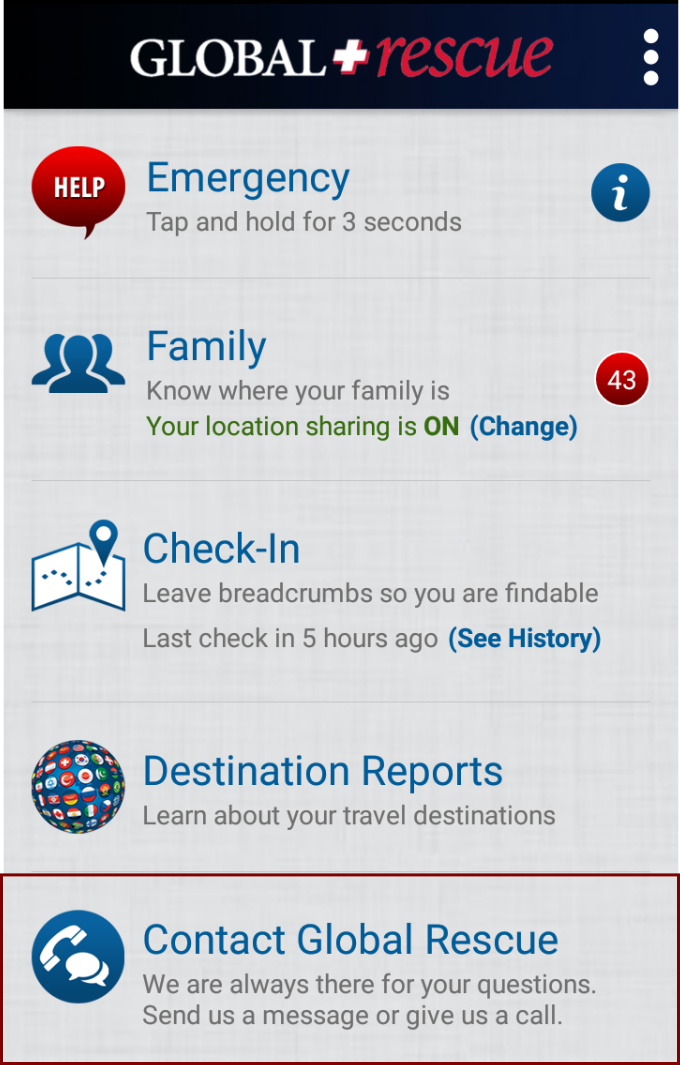
Once you have logged in successfully, you are now redirected to the dashboard. The dashboard consists of five main options for you to select. These options vary according to the type of membership that you have. If you have an individual membership, only four of the five features are available at your membership. An Individual membership has the following features:
All the other memberships such as Primary Membership, Spouse Membership and Dependent Membership has the following menu.
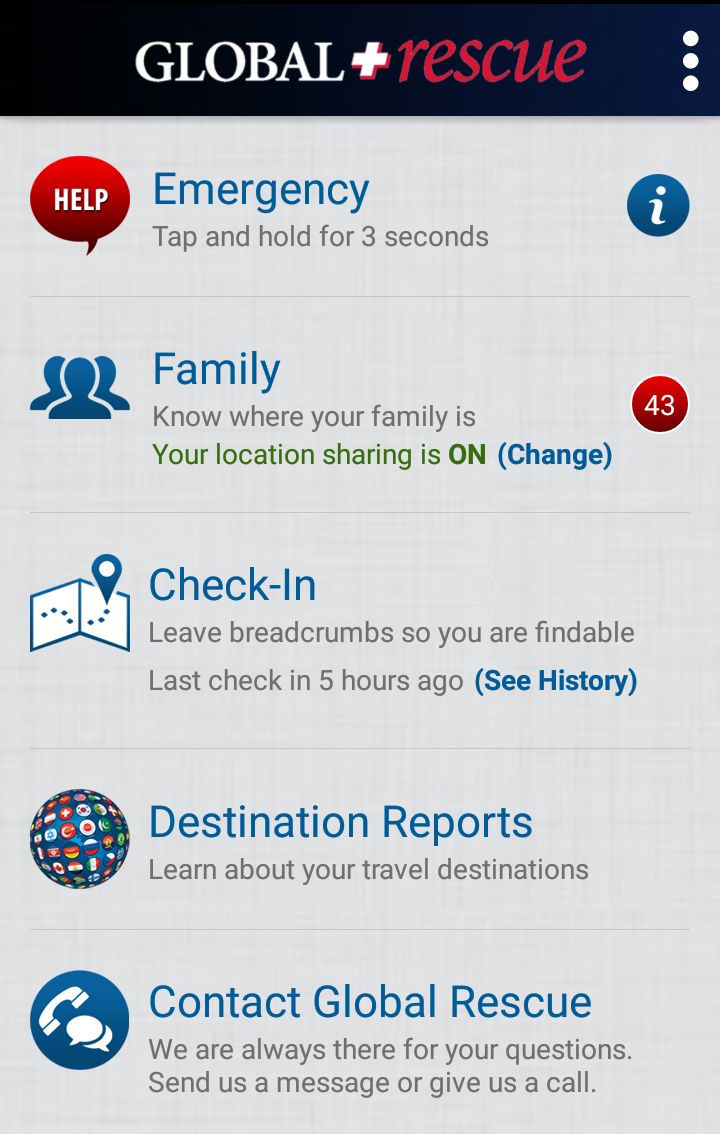
The Emergency tab allows you to generate an automated alert to the Global Rescue operations team in case of emergencies so that immediate relief can be provided to you.
The Family tab allows you to add up to five family members which consists of one spouse and four children. You can track their location and ensure that they are out of the harm’s way.
The Check In tab allows you to share your location with your family members. If you want to inform your parents or family that you have arrived safely, check in is a good way to send them a message.
The Destination Reports tab is useful when you are planning on travelling to another city, town or country. It informs you about the security conditions and risk conditions of your destination so you can check the situation of the country prior to your travel.
The last tab which is the Contact Global Rescue tab allows you to call Global Rescue helpline directly or even send them a text message.
EMERGENCY
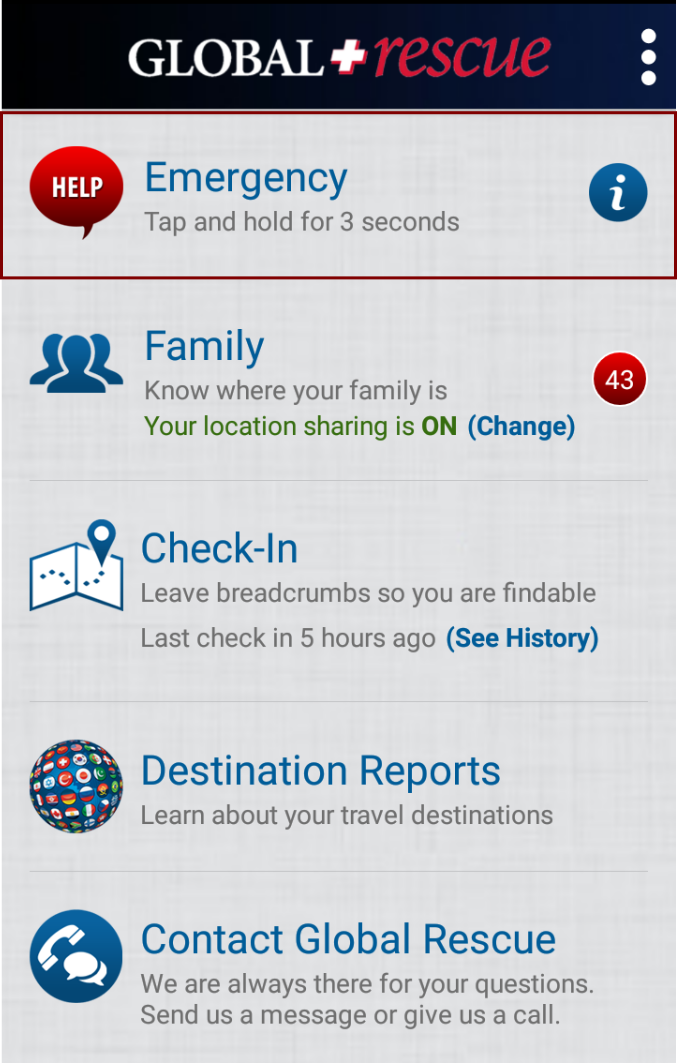
The main focus of the emergency tab is to enable you to send push notifications to the operations team at the Global Rescue Headquarters in case of dire emergencies. There is also a blue coloured help button to guide you as to what the emergency tab does and how you can send a notification for help to the operations team at the Global Rescue Headquarters.
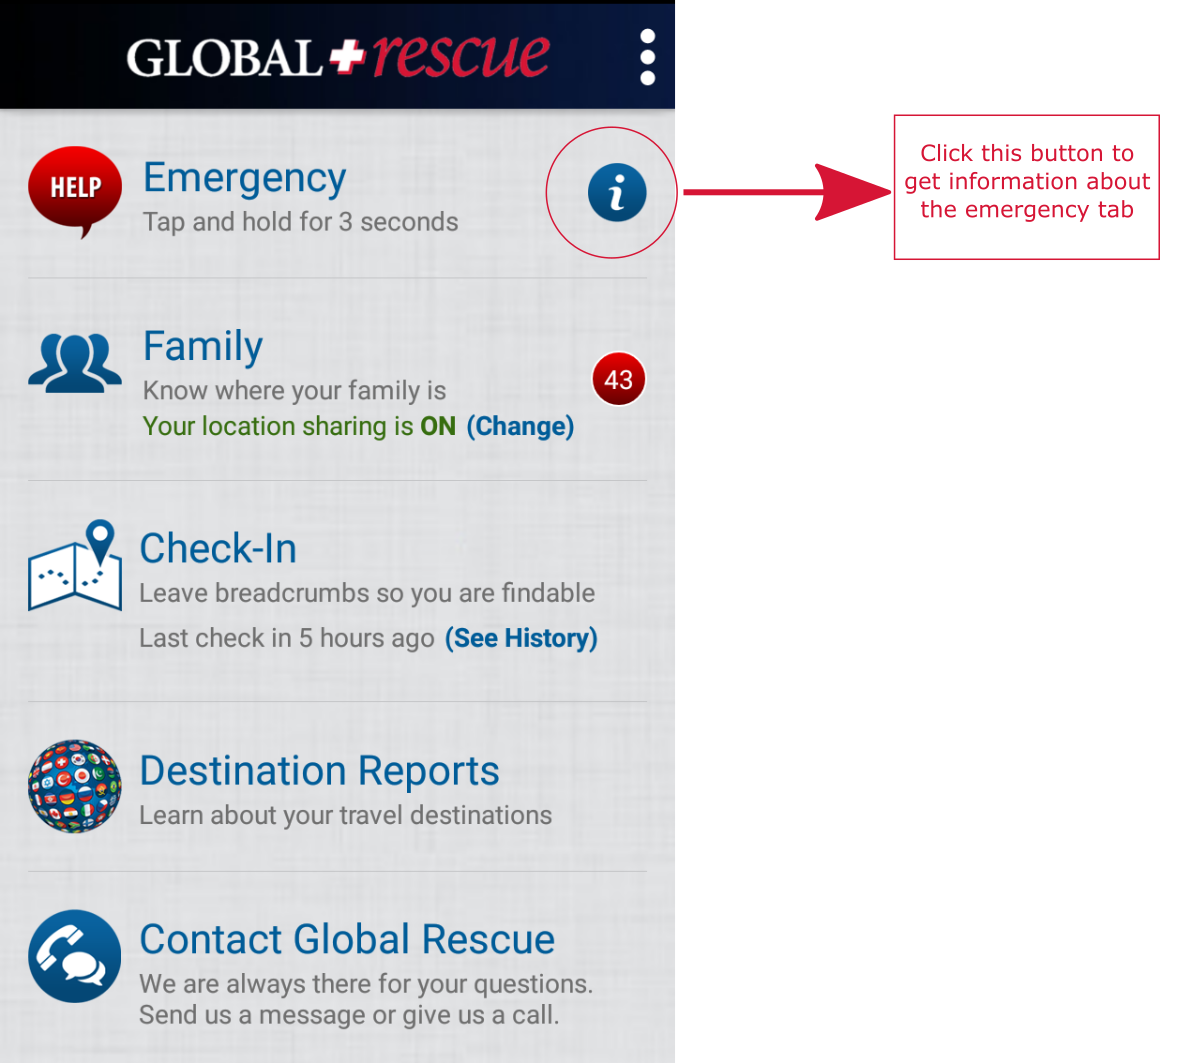
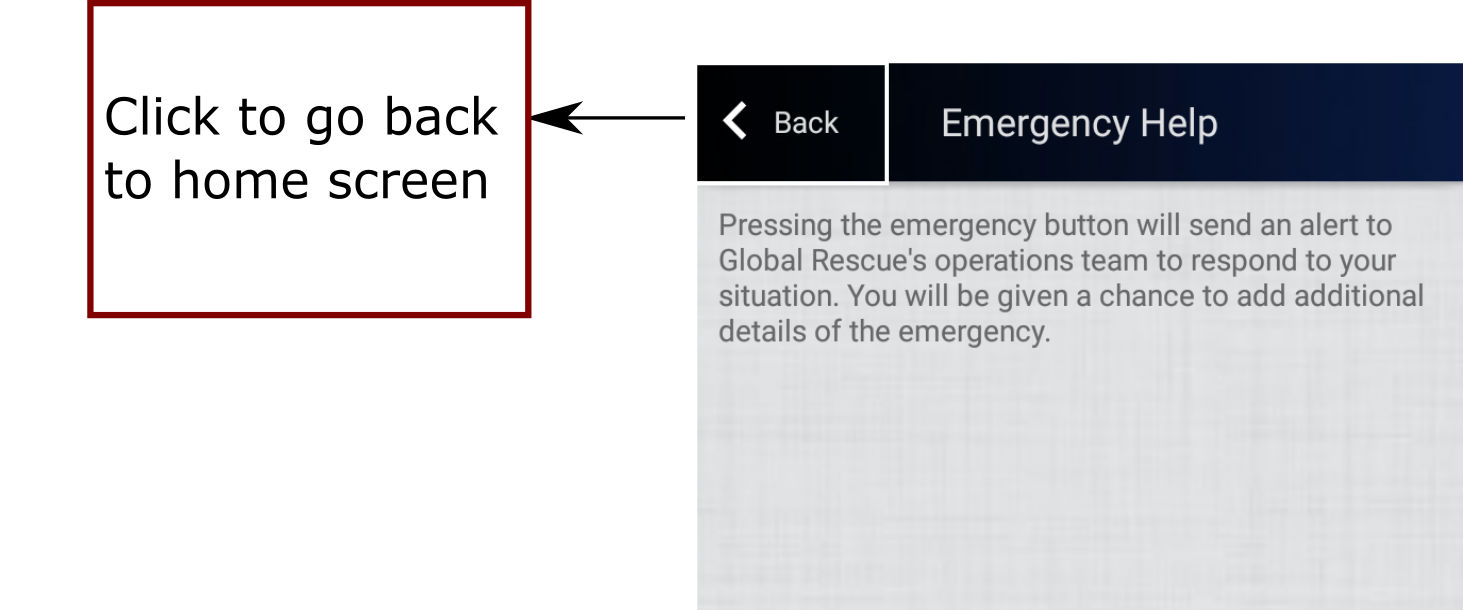
Once the blue button is clicked, it will take you to the emergency help where you can view the details of how to work your way through the Emergency tab. You can come back to the home screen by clicking the arrow icon on the upper-left corner of the screen.
Once you are back in the home screen, you can tap and hold the emergency tab for three seconds. After three seconds, an alert with the message sending emergency is displayed as the application uses location services to get your location coordinates and takes you to another screen where you can write a custom message related to your emergency to the Global Rescue operations team.
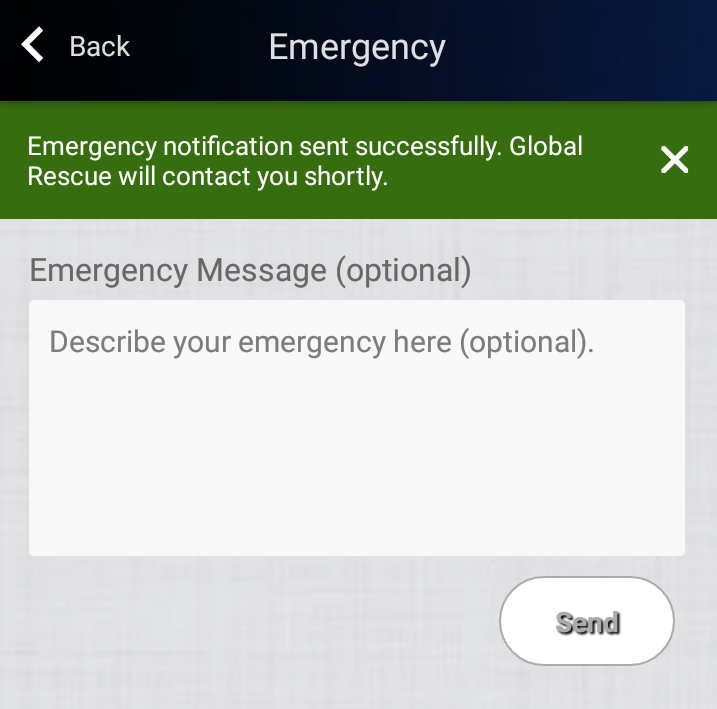
You can also describe the kind of emergency you are in and what kind of help you need so that the Global Rescue Operations team can cater to your needs efficiently. You can also tell the operations team of your exact location through this textbox. Once you hit the send button, a message is generated stating that your emergency notifcation is being sent and you are returned to the home screen with an alert saying that your emergency has been sent. The Global Rescue team will contact you shortly.
TOTALCARE CONSULTS
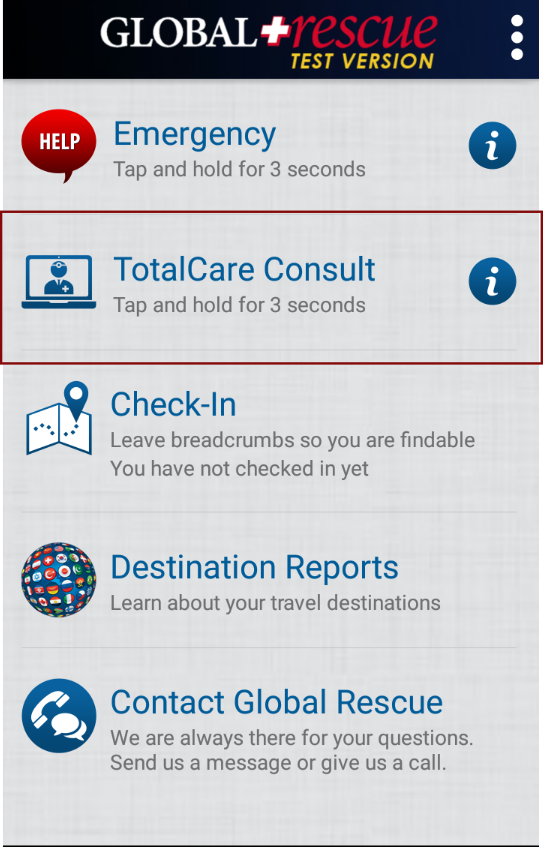
The TotalCare Consults can only be availed by members who have TotalCare memberships. To avail a TotalCare Consult, tap on the TotalCare Consult tab for three seconds. If you have a family membership, a sliding menu is displayed that prompts you to select which family member you want to acquire the consult.
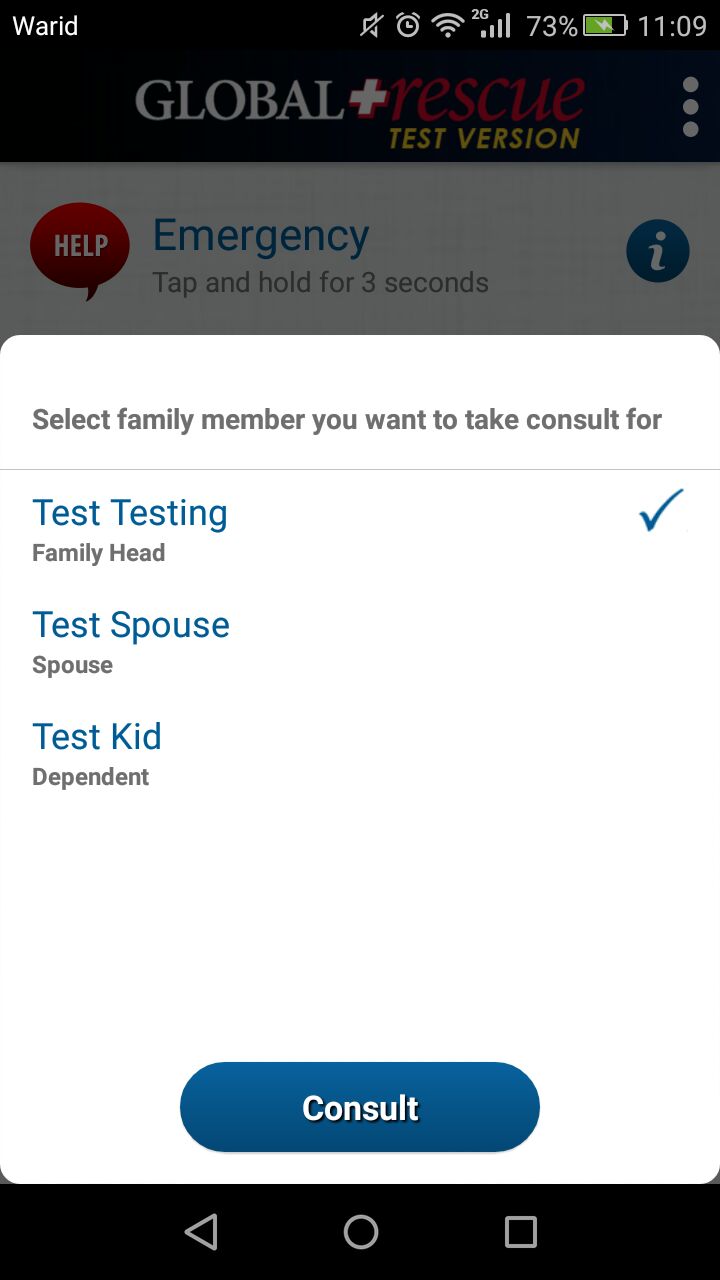
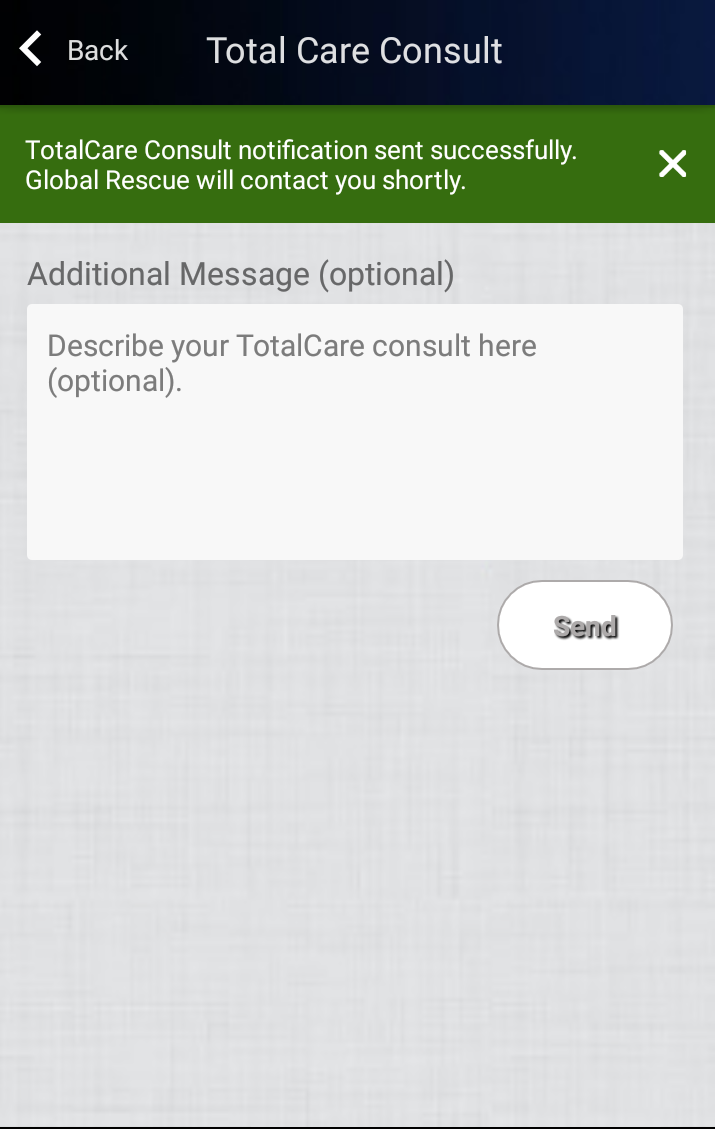
Once you have selected the family member for whom the consult is needed, a notification is sent to the Global Rescue Operations team and message is displayed that your TotalCare Consult notification has been sent and someone will contact you. You can also send additional details to Global Rescue in the textbox provided. A representative of Global Rescue contacts you through phone.
If you want to avail TotalCare Consults on the behalf of a family member, make sure that you have added them in your family member’s list. If you haven’t added them in your family members list, refer to the Family to learn how to add a new family member.
Note that while Global Rescue covers events around the world, you will receive alerts for event severity and locations based on any alert profiles configured for your account.
FAMILY

The family tab allows you to add new family members as well as be aware of their location all the time. Once you tap on the family tab, it takes you to the locate screen where you can view the location of your family members on the map as well as a list of who is where at what time. You can also send instant messages through the family tab by clicking on the chat option and there is also an intelligent feature of creating a geofence around an area. You can also request check-ins from family members or view their location history. The main screen for family tab is the locate screen which consists of the following options:
Locate
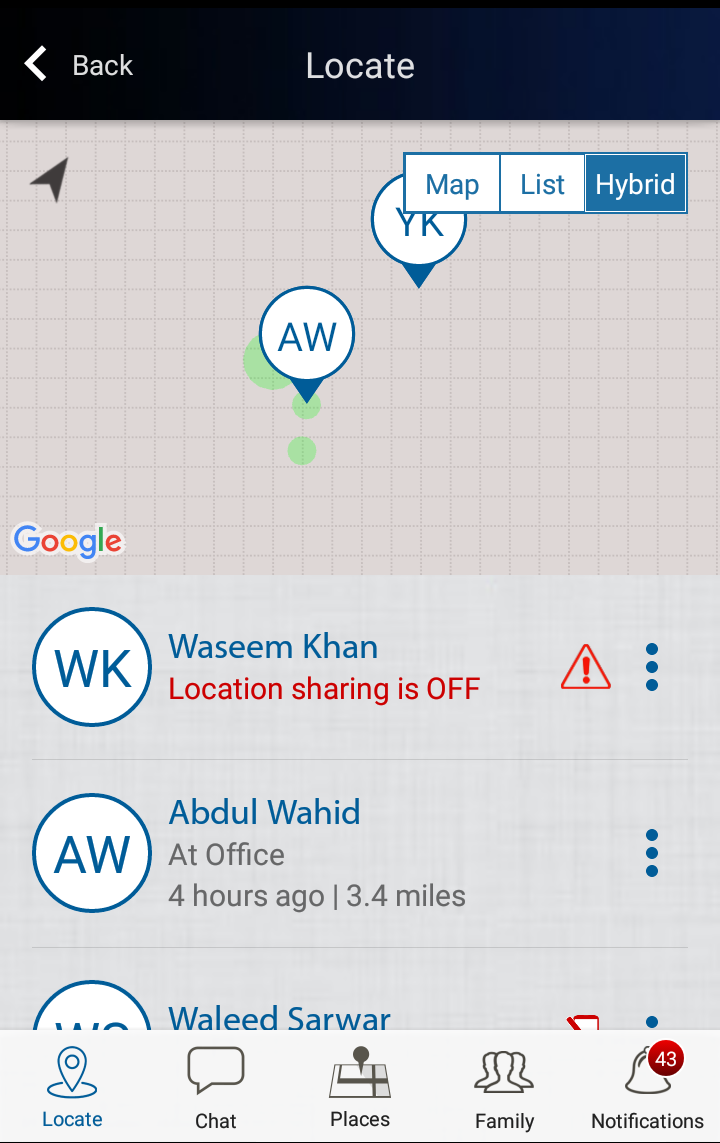
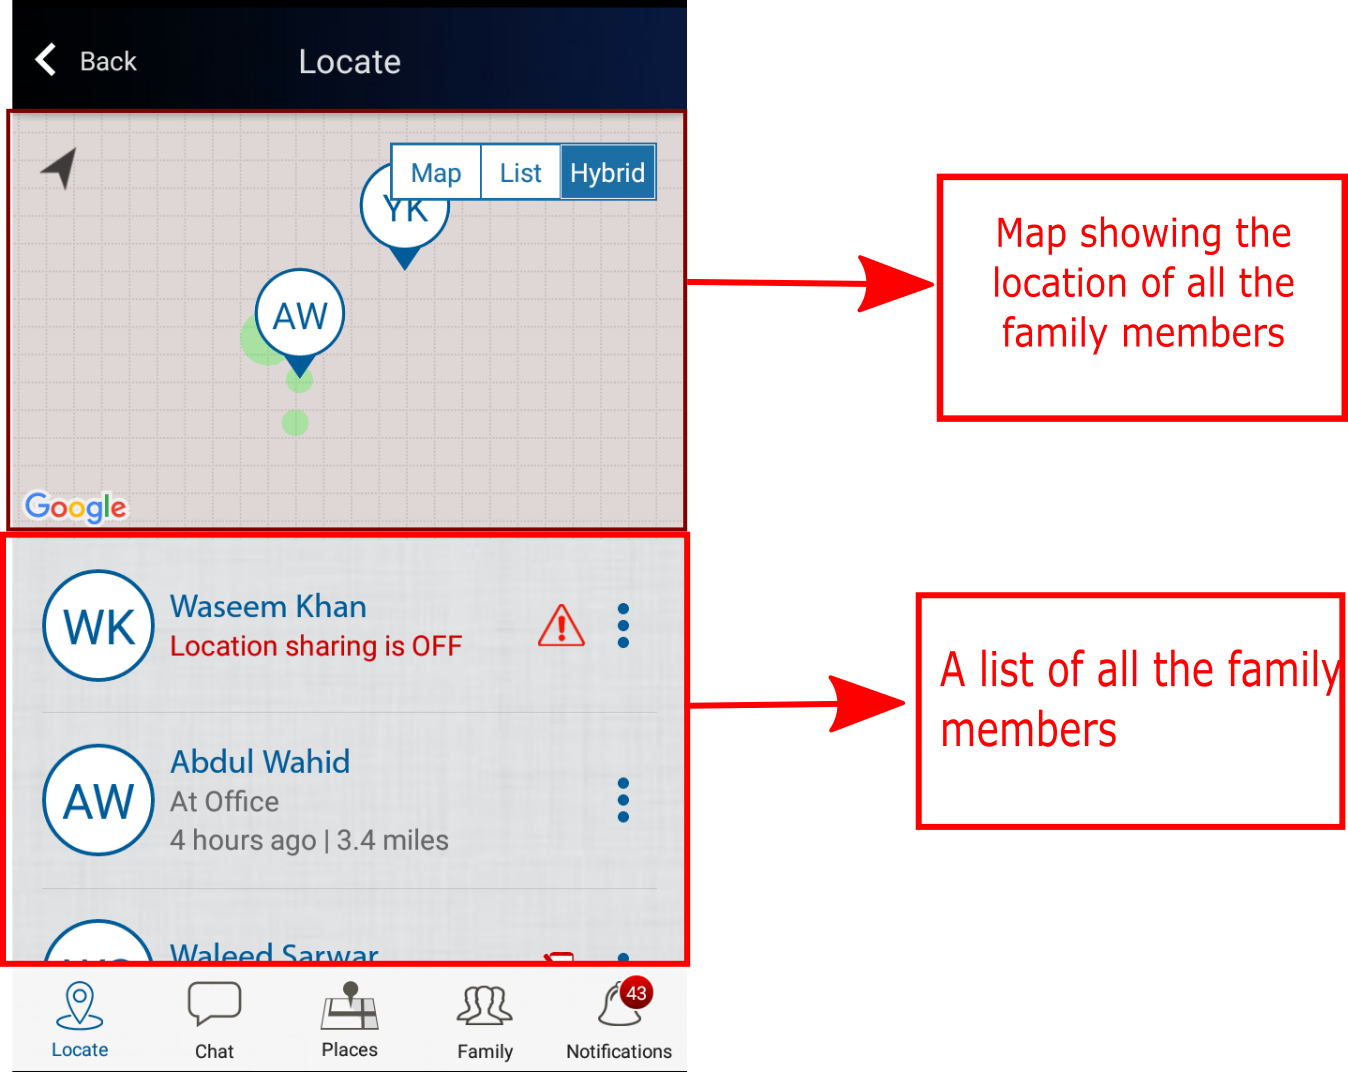
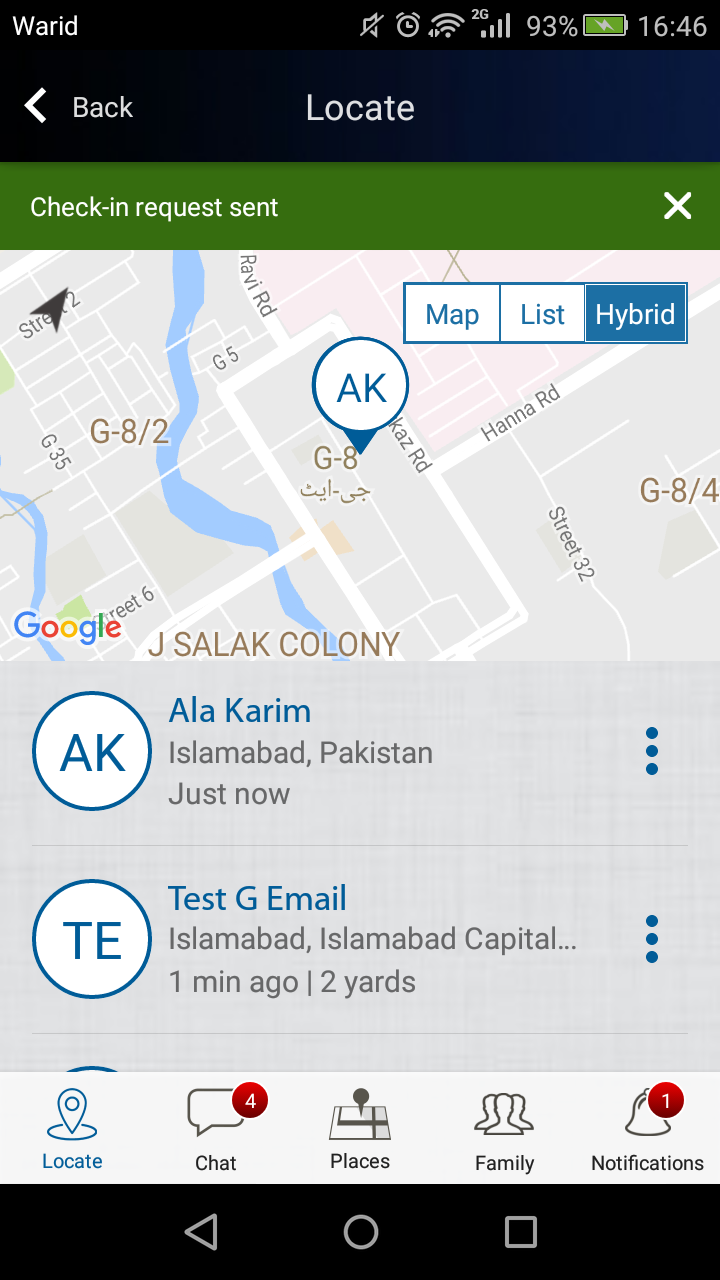
The locate screen displays all the family members that are added in your membership. It consists of two parts: the map view and the list view as shown in the figure below.
For each of the family members listed, you can do the following actions.
- Request a Check-In
- View their Location History

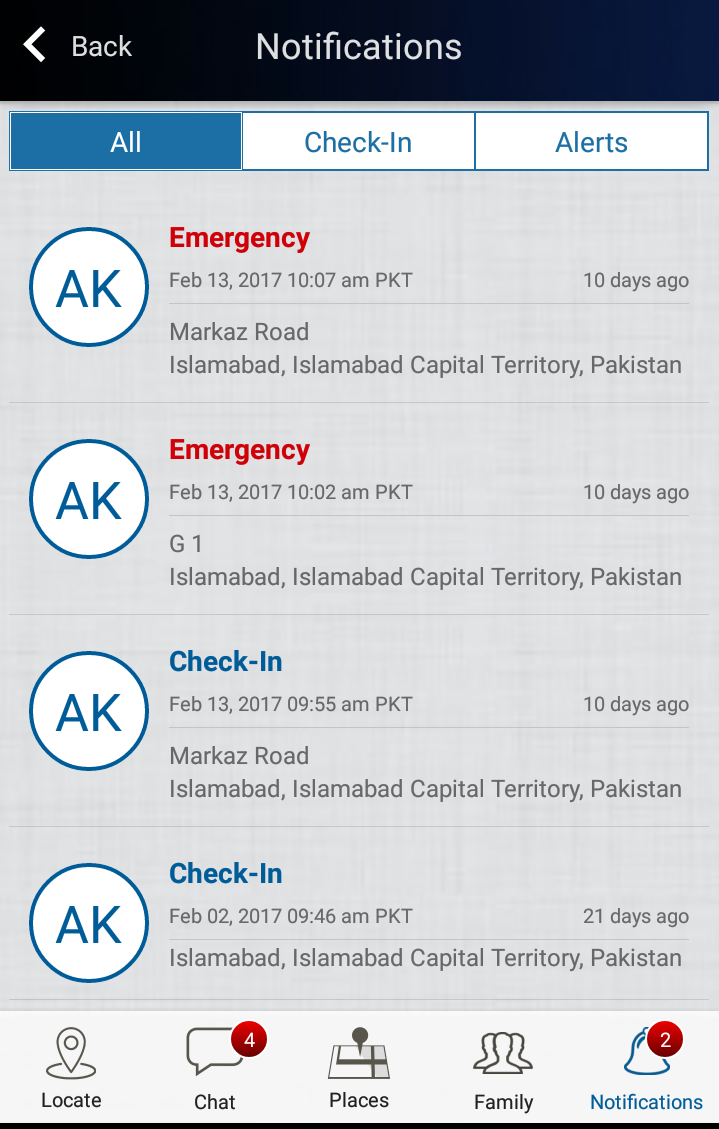
Clicking on the ‘Location History’ option displays the location history of the person that you want to view. To view this, tap on the location history tab which will take you to the notification screen where you can view the history of check-ins, emergency and other alerts. A sample screen is shown in the figure below.
If you want to update your own location, there will be the option of Check In Now. Clicking on the Check In option will share your location with all of your family members. In case you want to check the location of one of your family members, you can tap on request location to request them to update their location. A notification is generated that the check in request has been sent as shown in the figure below.
Chat
You can send instant messages to your family members through the chat screen. These messages can be group messages and instant messages.
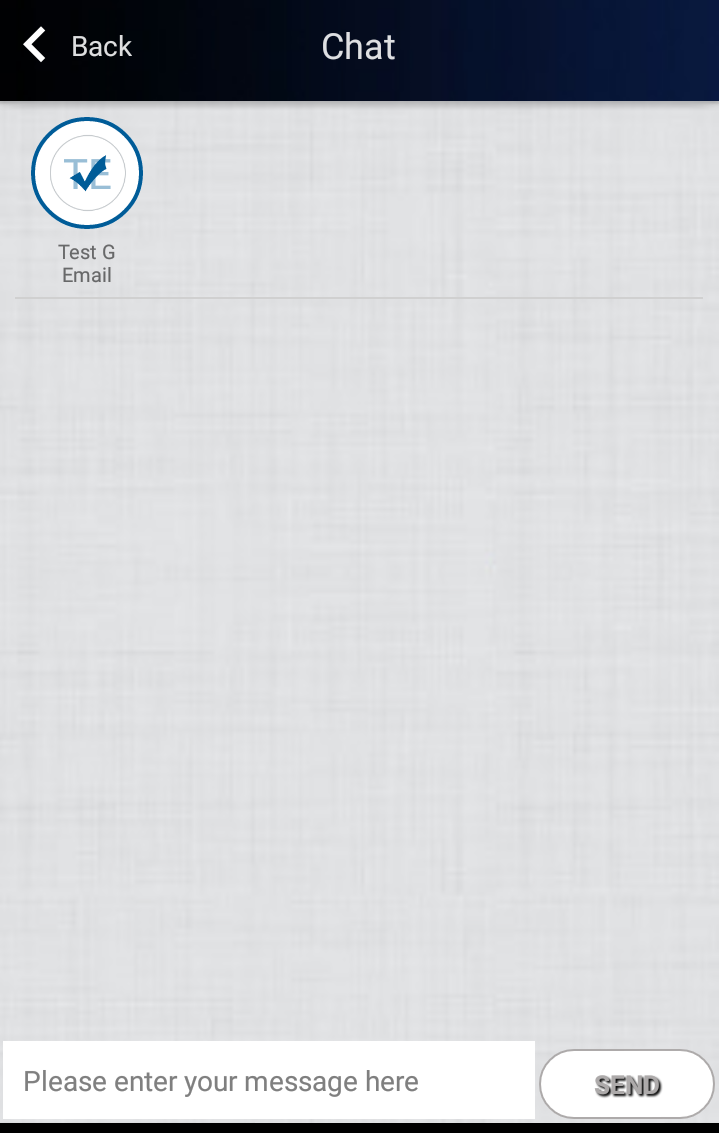
To send a new chat, click on the + button on the navigation menu of the screen as shown in the figure above. A new screen is displayed in which the recipients for chat are displayed and a text box to enter the message that you want to send.
Once you have entered the message in the text box, click the send button to send your message. There are two types of messages can be send through here.
- If the number of recipients for your message are more than one, then a group message will be sent.
- If the number of recipients for your message is one, then a personal message will be sent.
Places
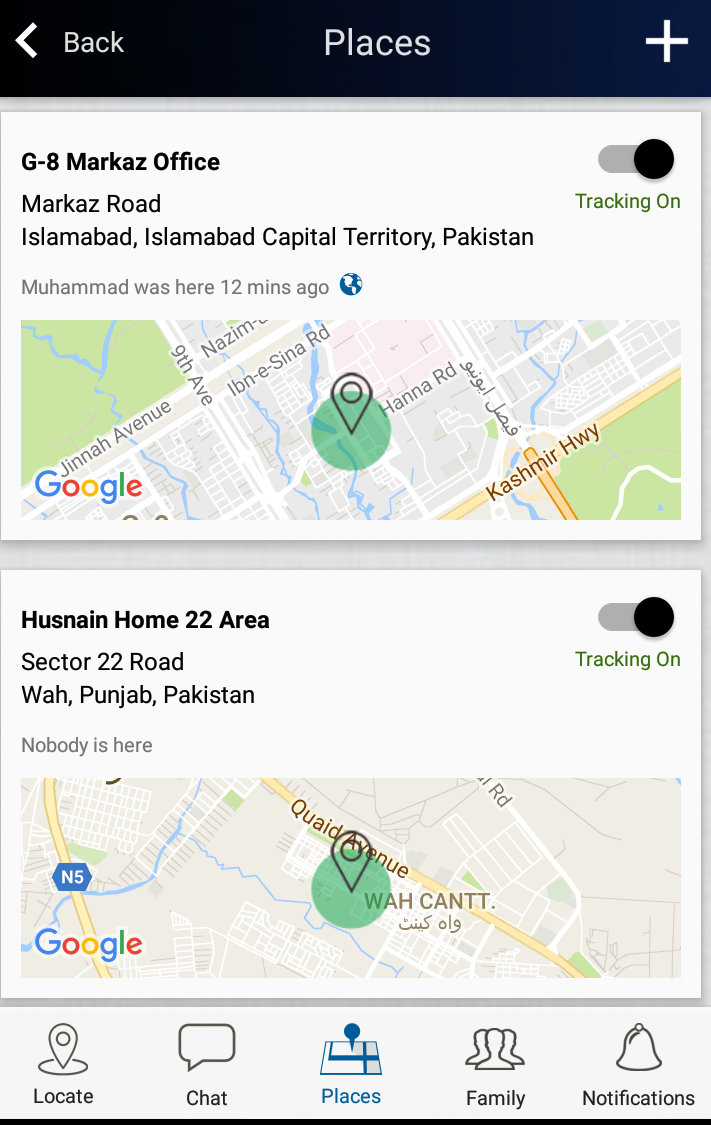
The places tab provides an interesting feature of Geofencing which allows you to mark your boundaries around places and when one of your family members leaves that place, a notification will be generated to inform you that they have left the boundaries. It is an intelligent feature to stay up to date about the current whereabouts of your family members. Moreover, you can also add new places and create boundaries for your family members.
Add New Places
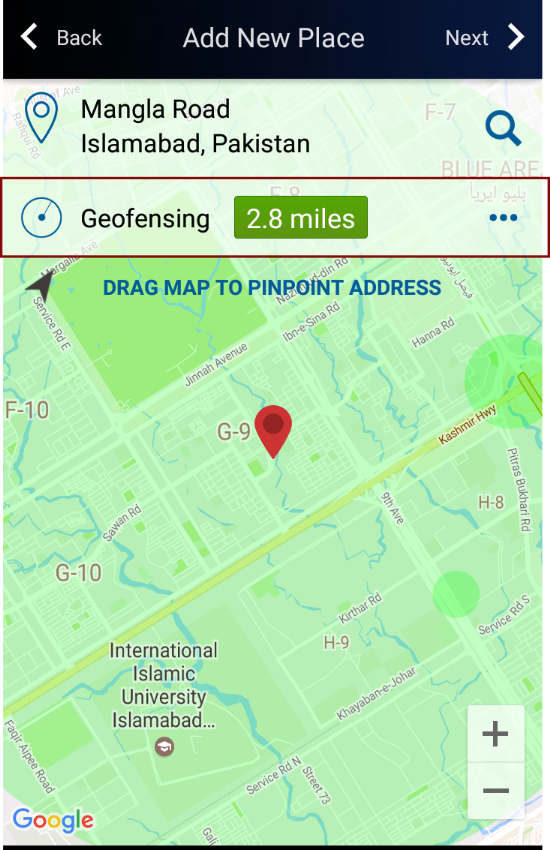
You can add different places in this tab and create a geofence around them. The maximum number of places that can be added in this tab are 20. To add a new place, click on the + icon on the top navigation menu. You are brought to the Add New Places screen as shown in the figure below.
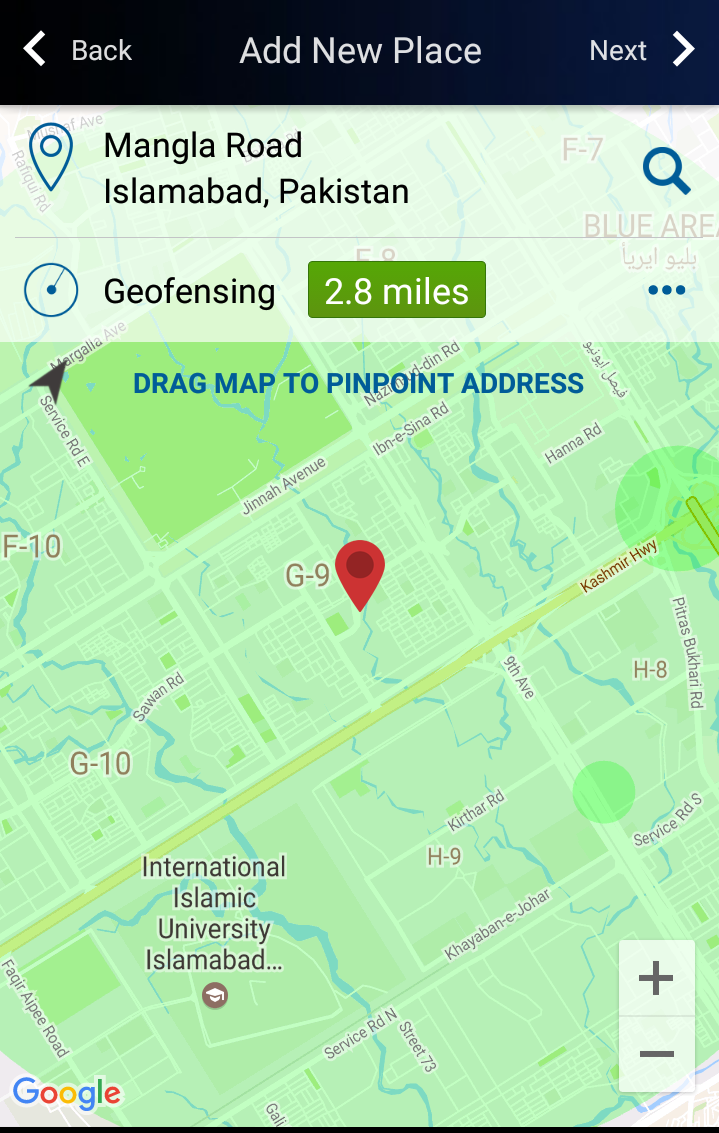
Enter the name of the place that you want to associate this geofence with. There are three different options that can be set for this particular geofence.
- Search using the search bar which will display the address in the map view.
- Click on the Geofencing option to create a Geofence.
- Drag the map to pin-point the location that you want to set.
To create Geofence, click on the geofencing option as shown in the figure below.
A menu is displayed that allows you to create geofence around your preferred location. This menu consists of four different options.
- 700 yds
- 1 mile
- 2 mile
- 3 mile
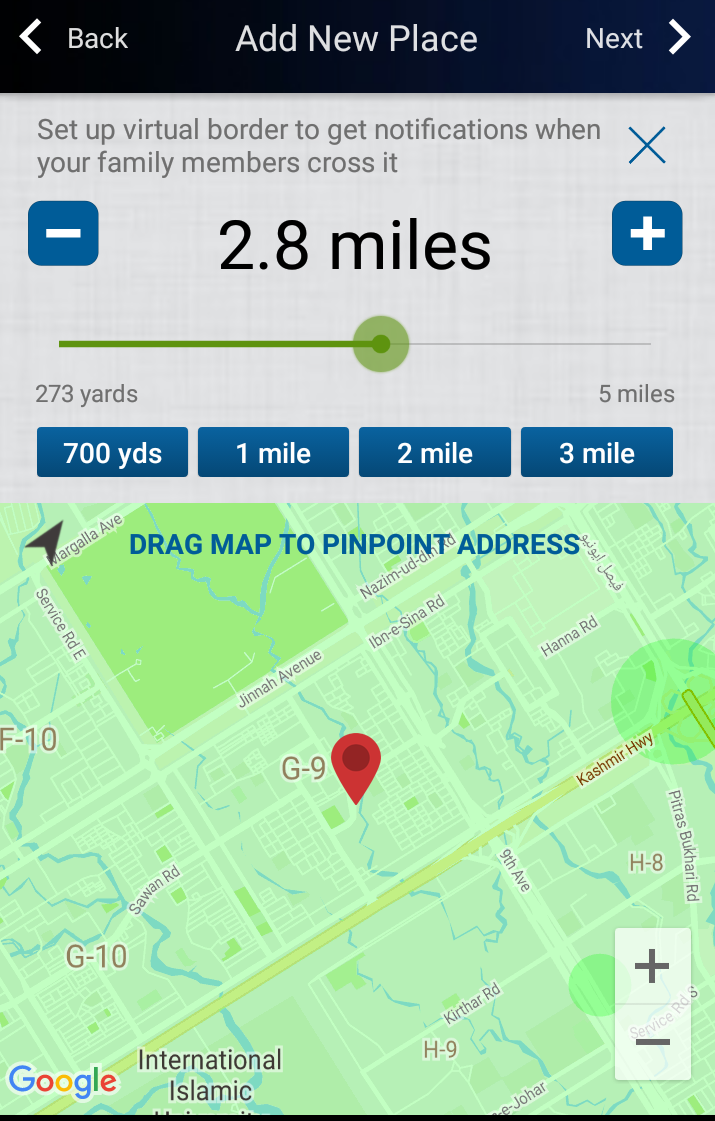
You can also set the fence using the + and – buttons to increase and decrease the value. There is also a progress bar to set the value. Once you have selected the fence, click on the Next button to save your fence. You are brought to the new screen where you can input the name and apply settings for your geofence.
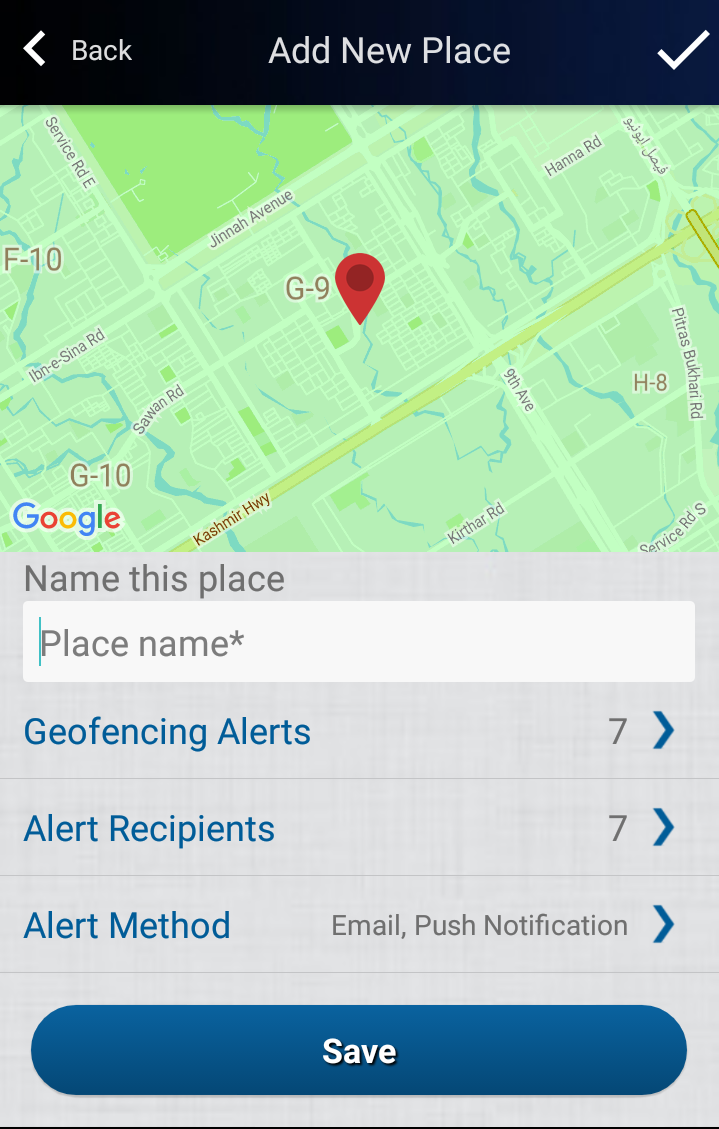
Enter the name of the place that you want to associate this geofence with. There are three different options that can be set for this particular geofence.
- Geofencing Alerts
- Alert Recipients
- Alert Method
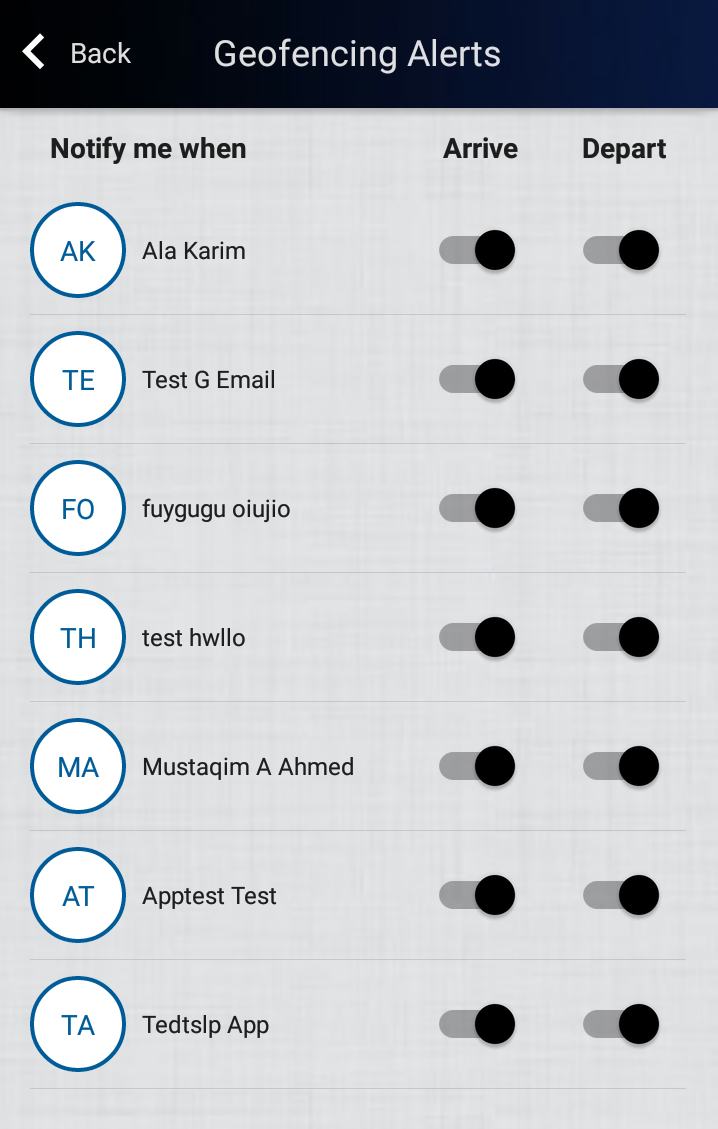
If you select the Geofencing Alerts, then the following screen is displayed. Here you can turn on and off alerts for the arrival and departure from your geofence of all your family members.
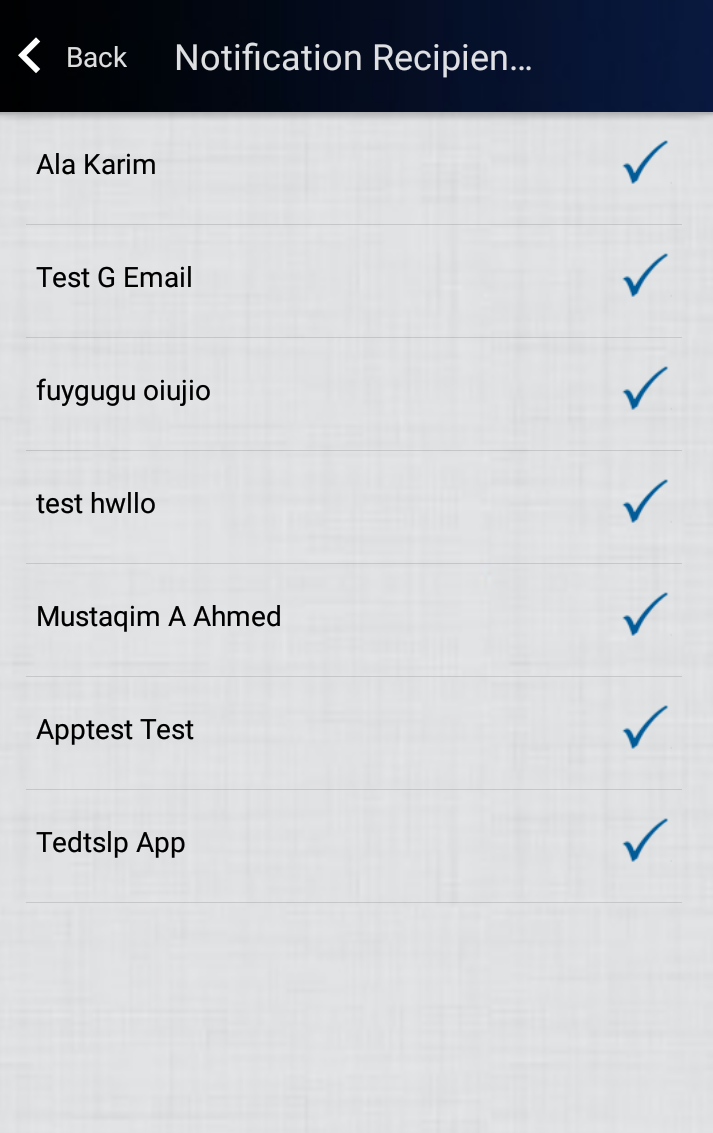
If you select the Alert Recipients option, then the following screen is displayed. Here a list of all your family members is displayed for which you can turn notification on and off.
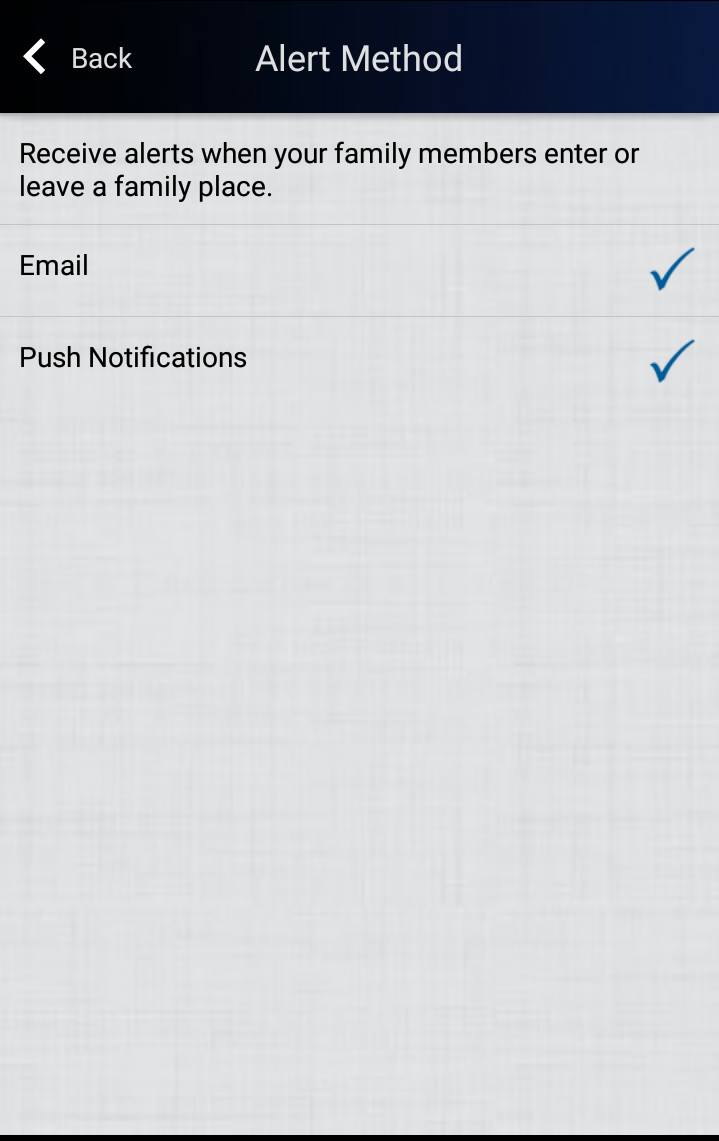
If you select the Alert Method option, then the following screen is displayed. Here you have the option to select whether you want the alerts to be in the form of emails or notifications. You can also select both of the alerts.
The family tab displays all the family members that are added in your membership account. From here, you can add, edit, update or delete as per your requirements.
Add Family Members
There are two ways in which you can add family members in your Global Rescue Consumer App. There are two ways to add family members:
Through Locate Screen
Through Family Screen
Only the primary membership holder and the spouse membership holder has the administrative rights to add or delete family members. Dependents don’t have the permissions to add or delete members. They can only update their location or send messages.
Through Locate Screen
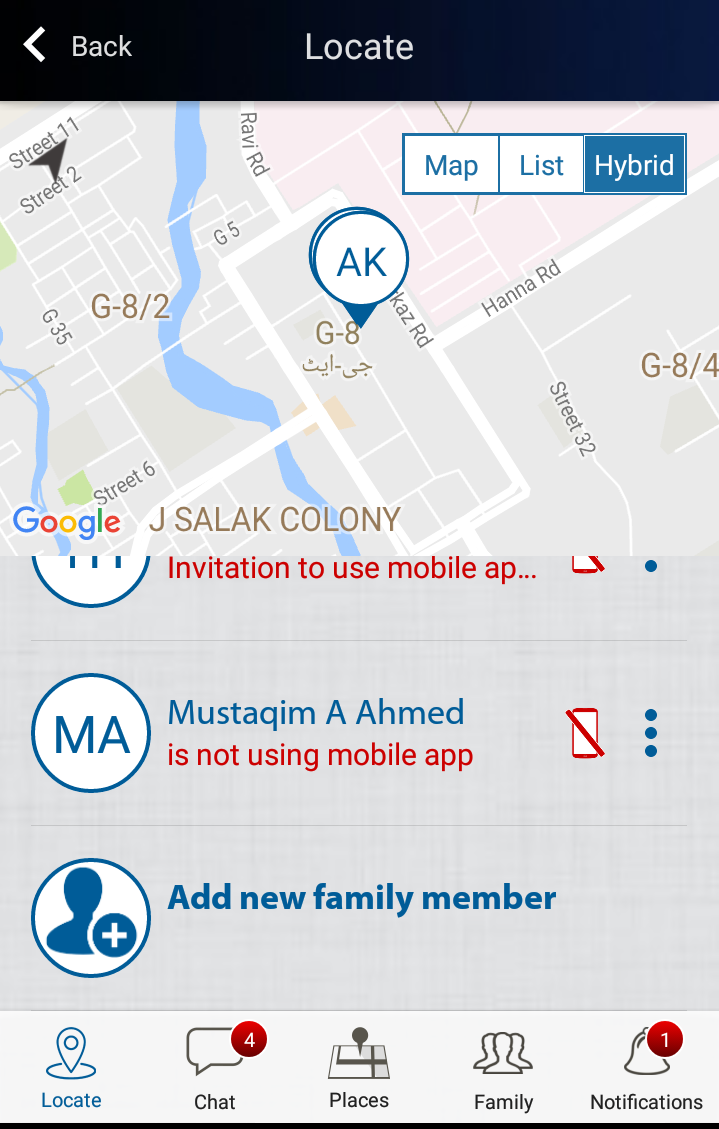
To add dependants through the locate screen, scroll down to the list view and click on the Add New Family Member as shown in the figure below.
You are brought to the Add New Member screen where there are list of fields which need to be populated with the dependent information as shown in the figure below. The Add New Member screen consists of the following fields.
- Profile Image
- First Name
- Middle Initial
- Last Name
- Relationship
- Gender
- Date Of Birth
- Phone
- Satellite Phone
- Address Line 1
- Address Line 2
- City
- Zip Code
- Access to Mobile App
Populate all the fields in the form and click save once you have entered the information. The newly added dependent is now displayed in the list view. If you have provided the dependent with the permission to access the Mobile App, then an email will be sent which consists of the login and the password to login to the mobile app.
Through Family Screen
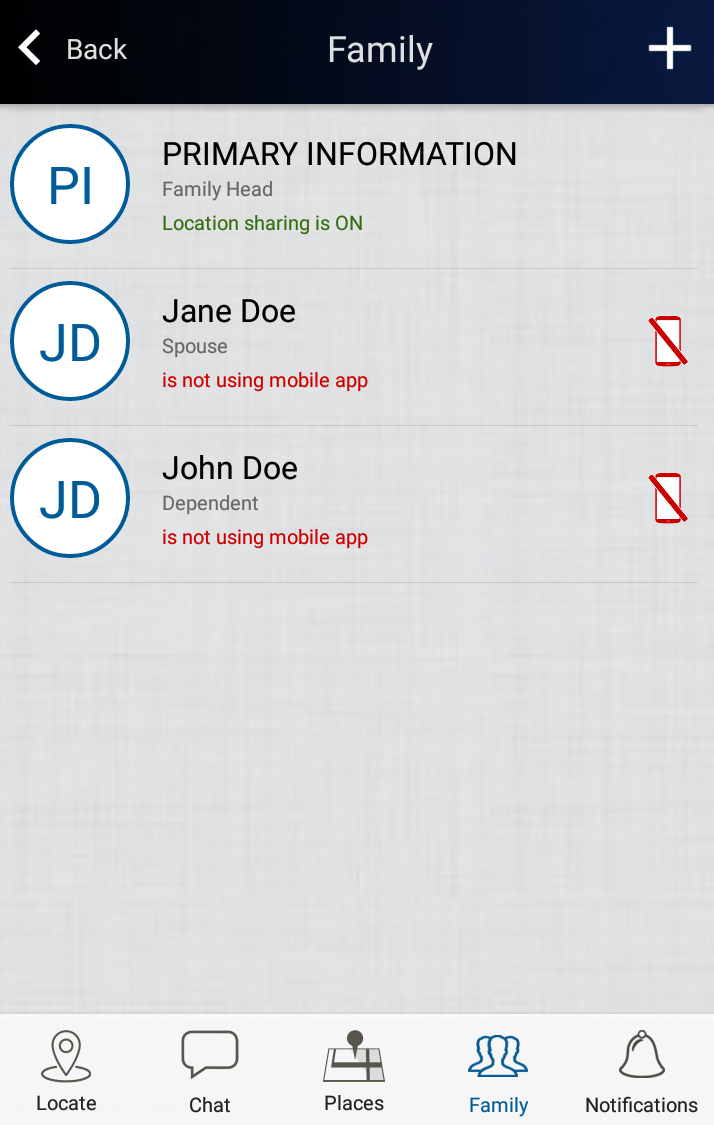
To add a family member through the family tab, click on the Family tab from the menu at the bottom of the screen. You are brought to the family screen from where you can add, edit or delete a dependent easily. To add a new spouse or dependent, click on the + icon at the main navigation of the screen as shown in the figure below.
Clicking on the icon brings you to the Add New Member screen which consists of the following fields:
- Profile Image
- First Name
- Middle Initial
- Last Name
- Relationship
- Gender
- Date Of Birth
- Phone
- Satellite Phone
- Address Line 1
- Address Line 2
- City
- Zip Code
- Access to Mobile App
Populate all the fields in the form and click save once you have entered the information. The newly added dependent is now displayed in the list view. If you have provided the dependent with the permission to access the Mobile App, then an email will be sent which consists of the login and the password to login to the mobile app.
Edit Family Members
To edit a family member, click on the Family tab in the locate screen. This displays all the family members in a list.
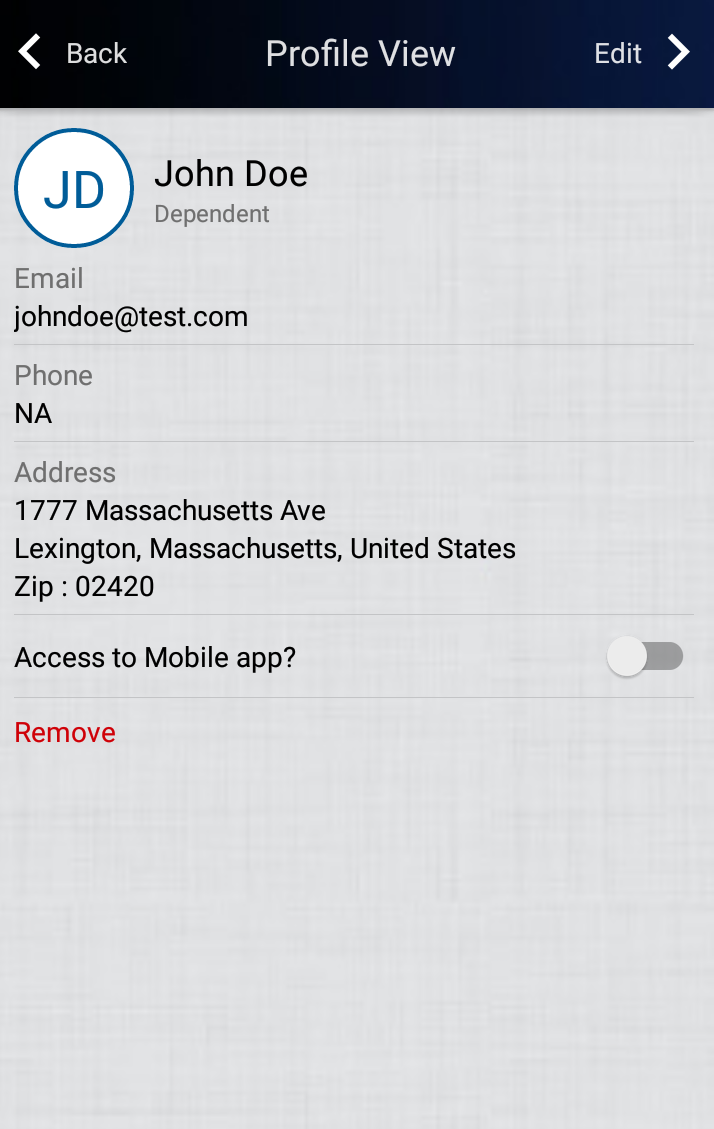
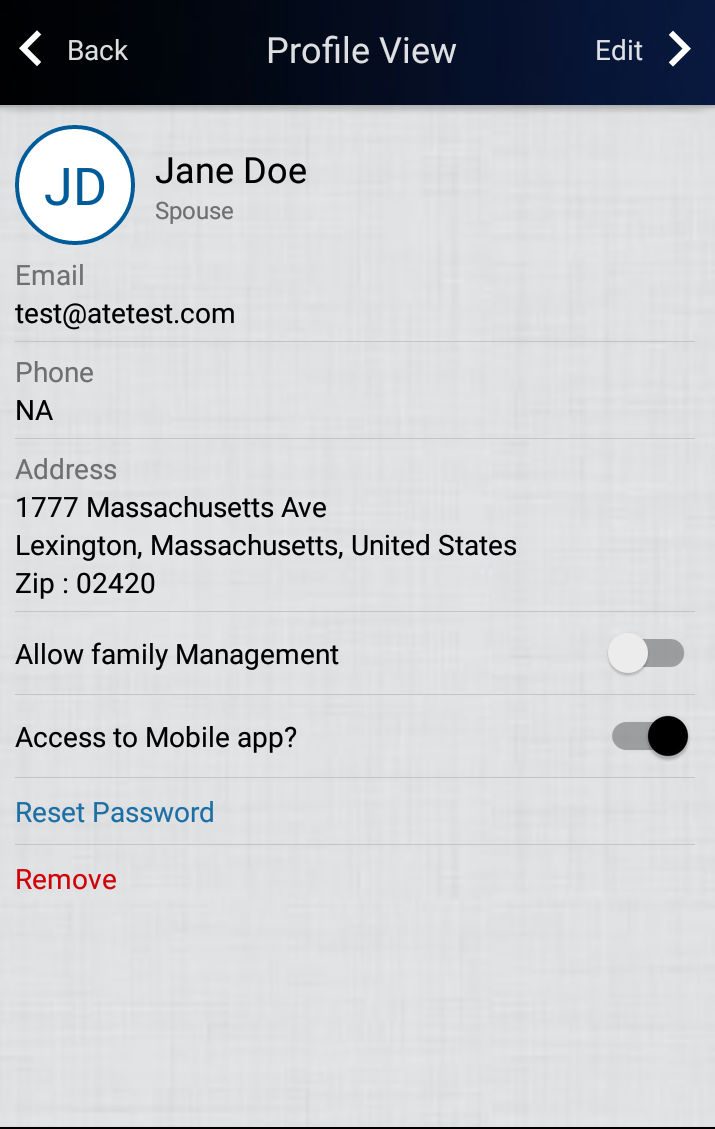
From here, tap on the family member that you want to edit. You are redirected to the Profile View screen where the following details are displayed.
- Name
- Relationship
- Phone
- Address
- Access to Mobile App
Click on the Edit option in the main navigation to edit the family members information. You are brought to the Edit Member screen where the following fields are displayed and can be changed by the user. Some of the fields are prepopulated with the data already as shown in the figure below. Fill in the fields that you want to change for this
Delete Family Members
To remove a family member, click on the Family tab from the menu at the bottom of the screen. You are brought to the family screen from where you can add, edit or delete a dependent easily.
Tap on the family member that you want to remove to view their profile. Once their Profile View Screen is displayed, there will be remove option at the botton as shown in the figure below. Clicking on the remove option will remove the family member.
Notifications
The notification tab displays all the notifications that are generated in the app. These consists of the emergency notification, the system notifications, alerts as well as all the check ins are done by the member.
CHECK IN
Check In, as the name suggests, allows you to share your location with your family members. If you are traveling and want your family members to know your location, you can use this features to inform them of your whereabouts. Once you tap on the check in tab, it will take you to a new screen which has a map that pinpoints to your current location, on the top of the map is your current address being displayed with a nearby button and a text box to send optional message to your family members as shown in the figure below.

Once you click the nearby button, a list of suggested places that are nearby you are shown. With this feature, you can have a list of nearby places from where you can get immediate help. You can also ensure that

The application will use the location service i.e. the GPS on your mobile device to get your current location. When you tap on the optional message text box, it takes you to a new screen where you can type in your message. There are also custom messages listed there that you can use to check in your location. On this screen, your location is also being shown just below the check in button.
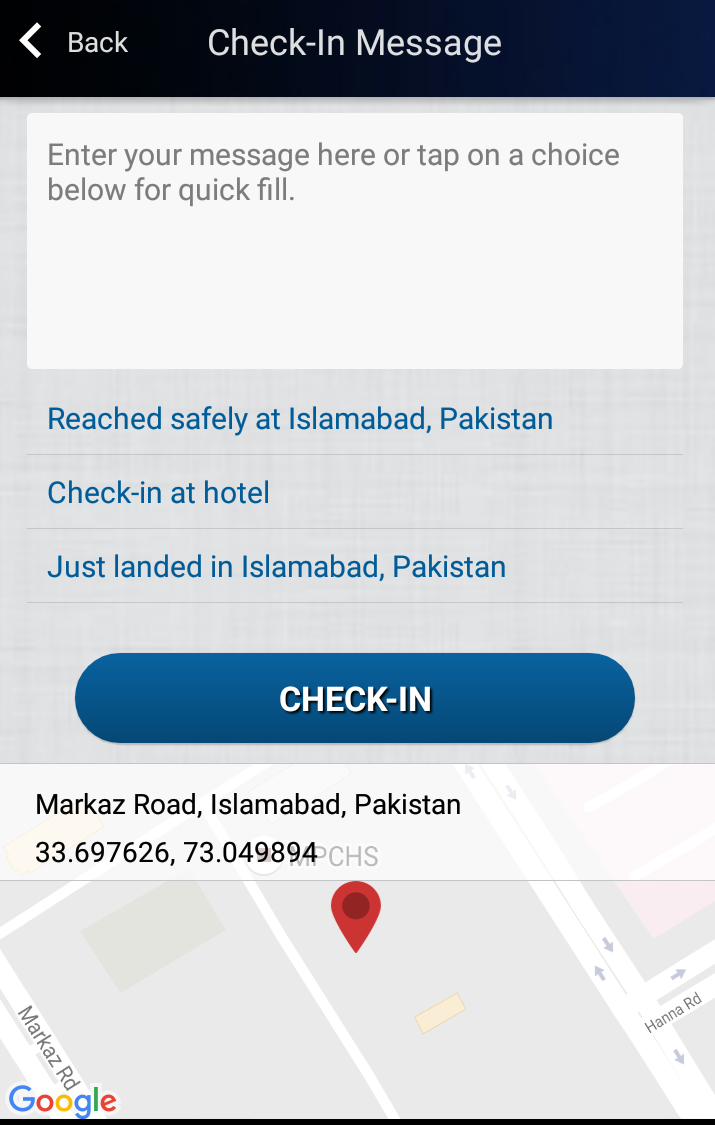
Once you’ve typed in a message or selected a custom message from the list show below the textbox, you can tap on the check in button to send the message. This brings you back to the home screen where a message is generated that your check in was successful.
DESTINATION REPORTS
The destination reports is an intelligent feature that allows you to check the risk conditions of the destination you are travelling to. It has overall four different risk ratings: low, moderate, high and extreme. When you select the destination reports option, the application will take you to the next screen which displays a list of countries as shown in the figure below.
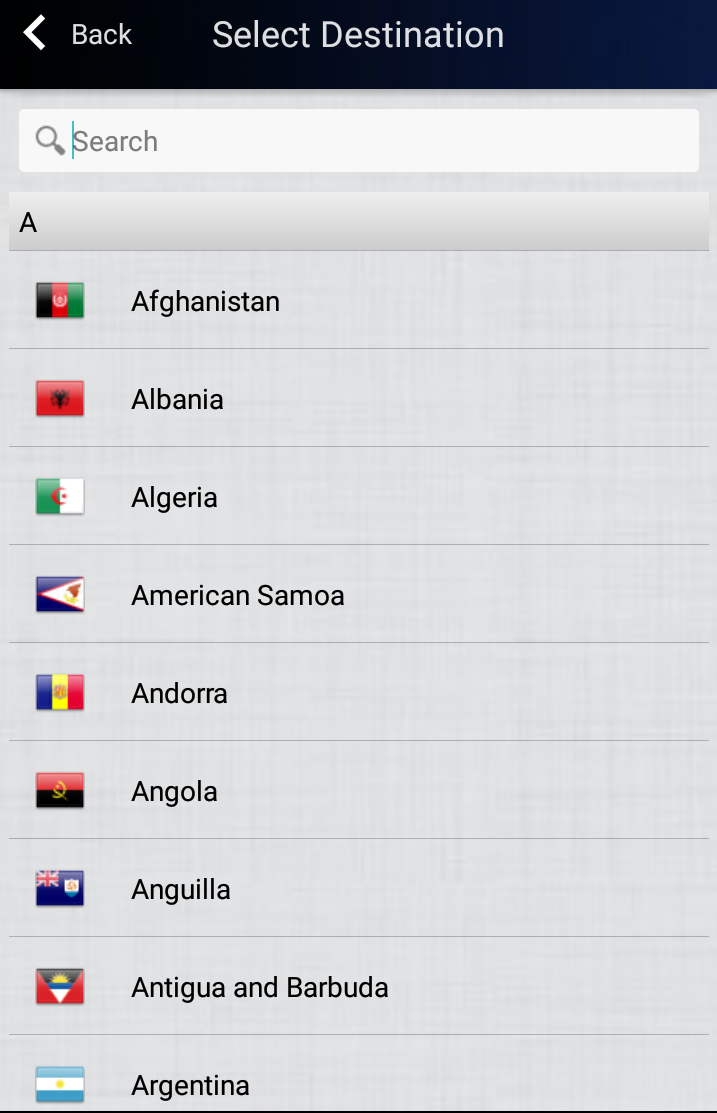
Select the country where you are travelling. It then takes you to the main screen of the destination reports.
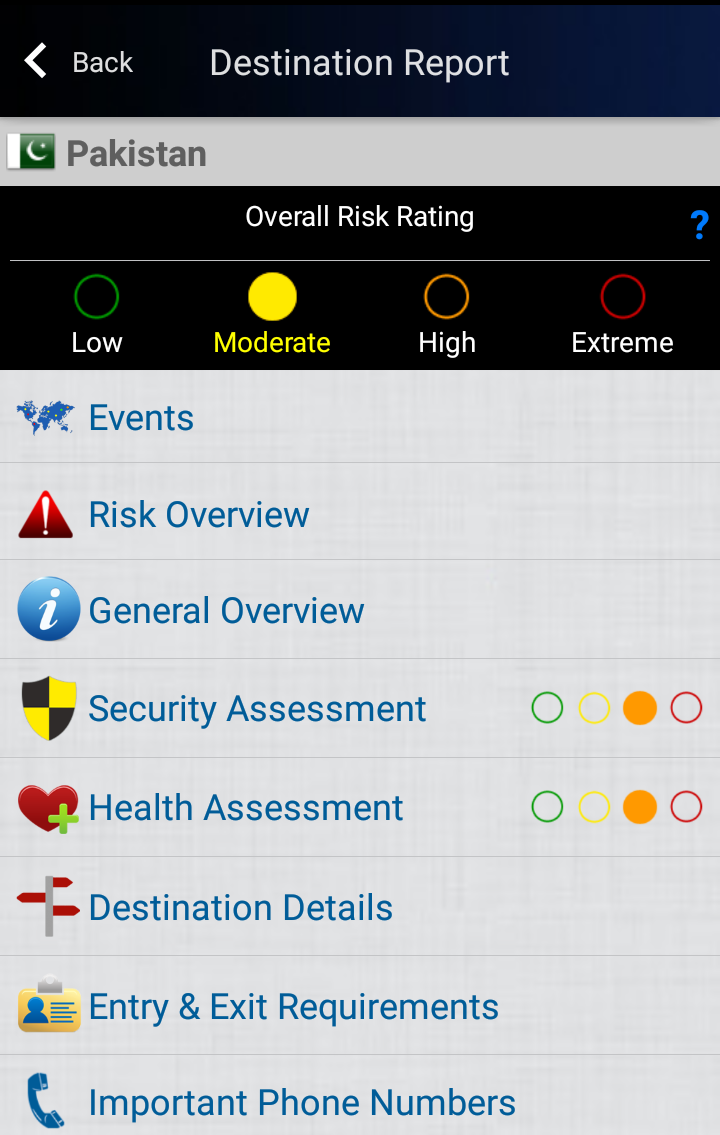
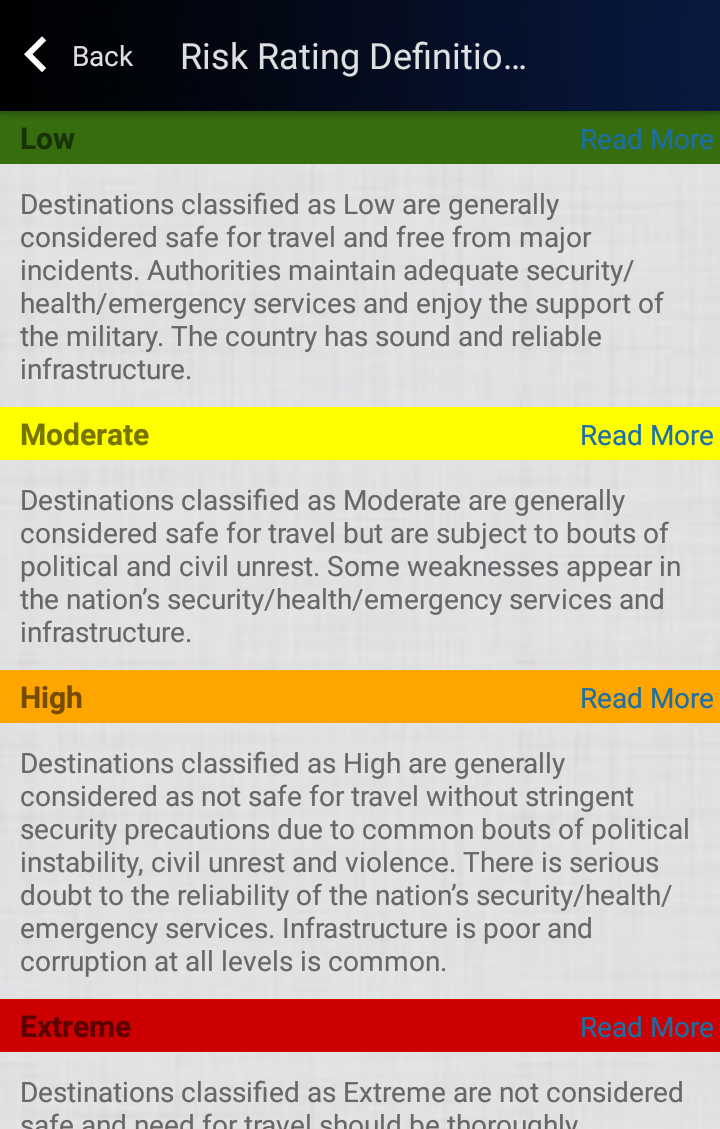
Here, the risk rating will show the risk of travelling to that particular country. It also has a number of options in that country for example events, risk overview, general overview, security assessment, health assessment, destination details, entry and exit requirements and important phone numbers. This screen also has a help button which you can press to review the details about the risk ratings.
CONTACT GLOBAL RESCUE
The contact global rescue tab provides you with the option to contact us at our headquarters for further assistance. For people within the US, the helpline number is (800) 381-9754 and for international callers, the helpline number is +1 (617) 459-4200.
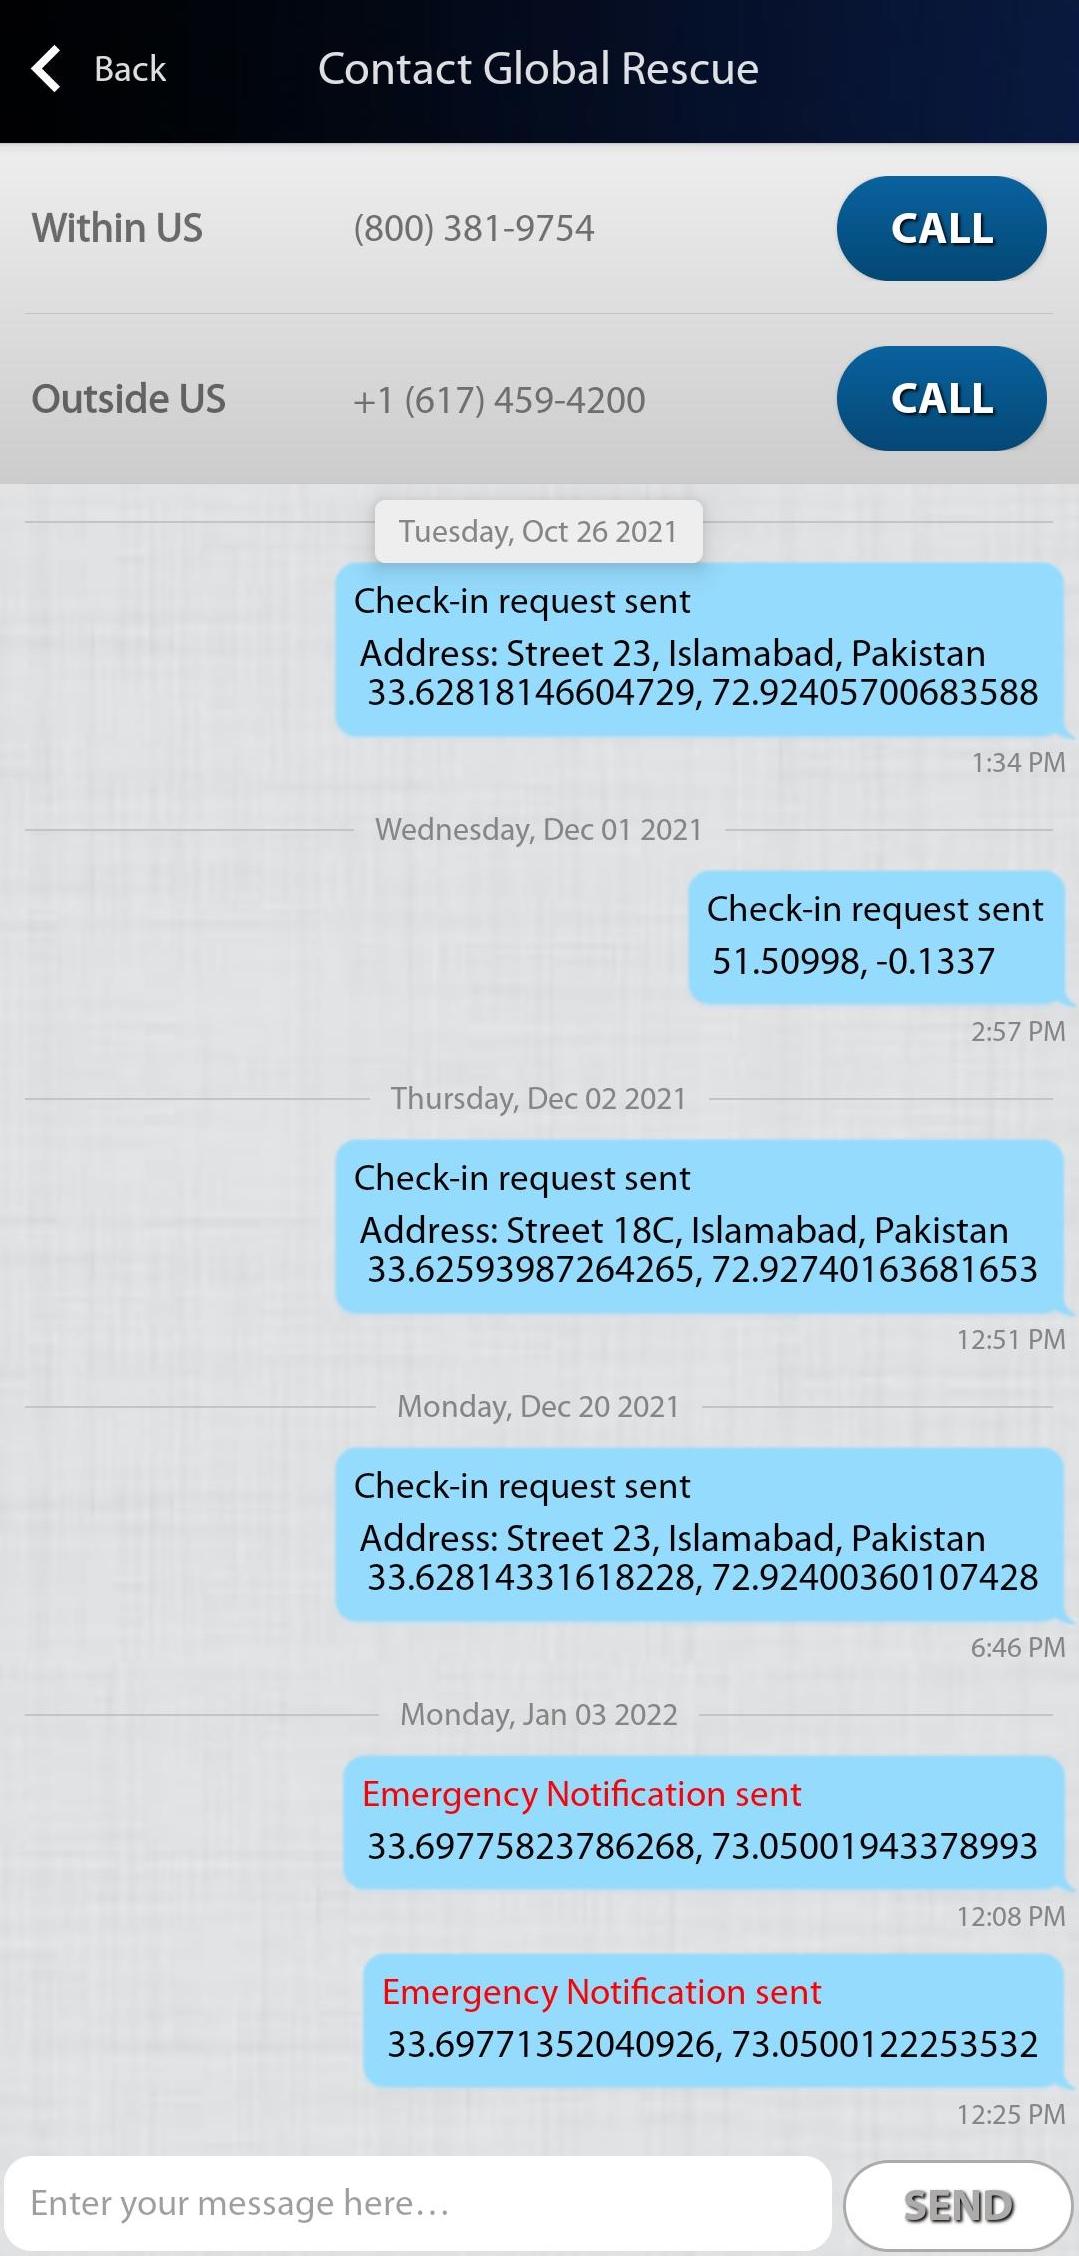
You can also send a sms through the application by typing a message in the message box and pressing the send button.
There is also an option of direct calling by the app. When you enter the contact global rescue screen, there are two buttons for people dialling within the US and people dialling from outside.
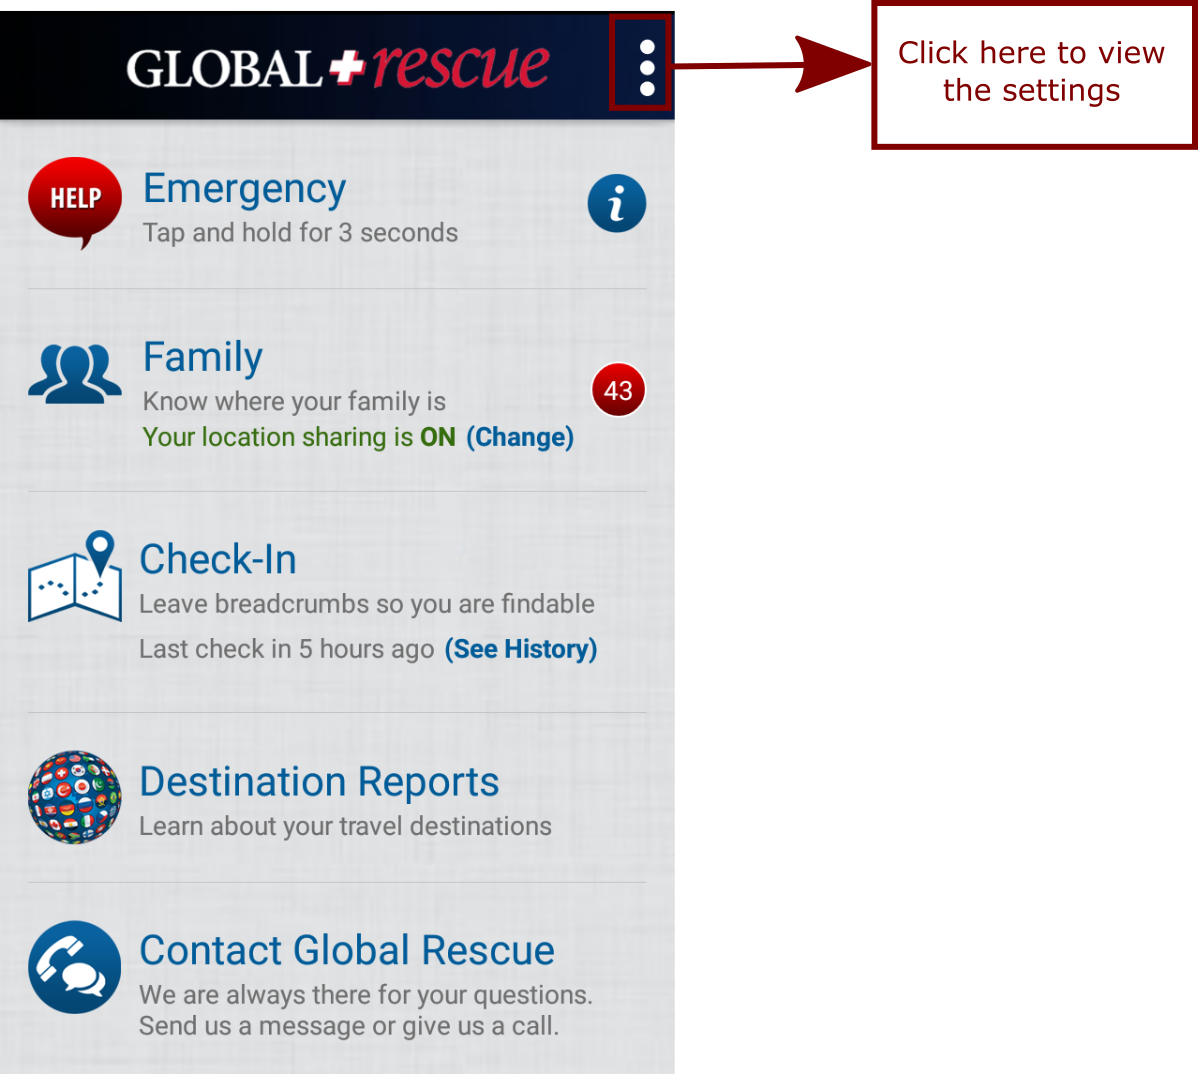
SETTINGS
To go to the settings of the mobile app, click on the side menu in the menu bar as shown in the figure below.
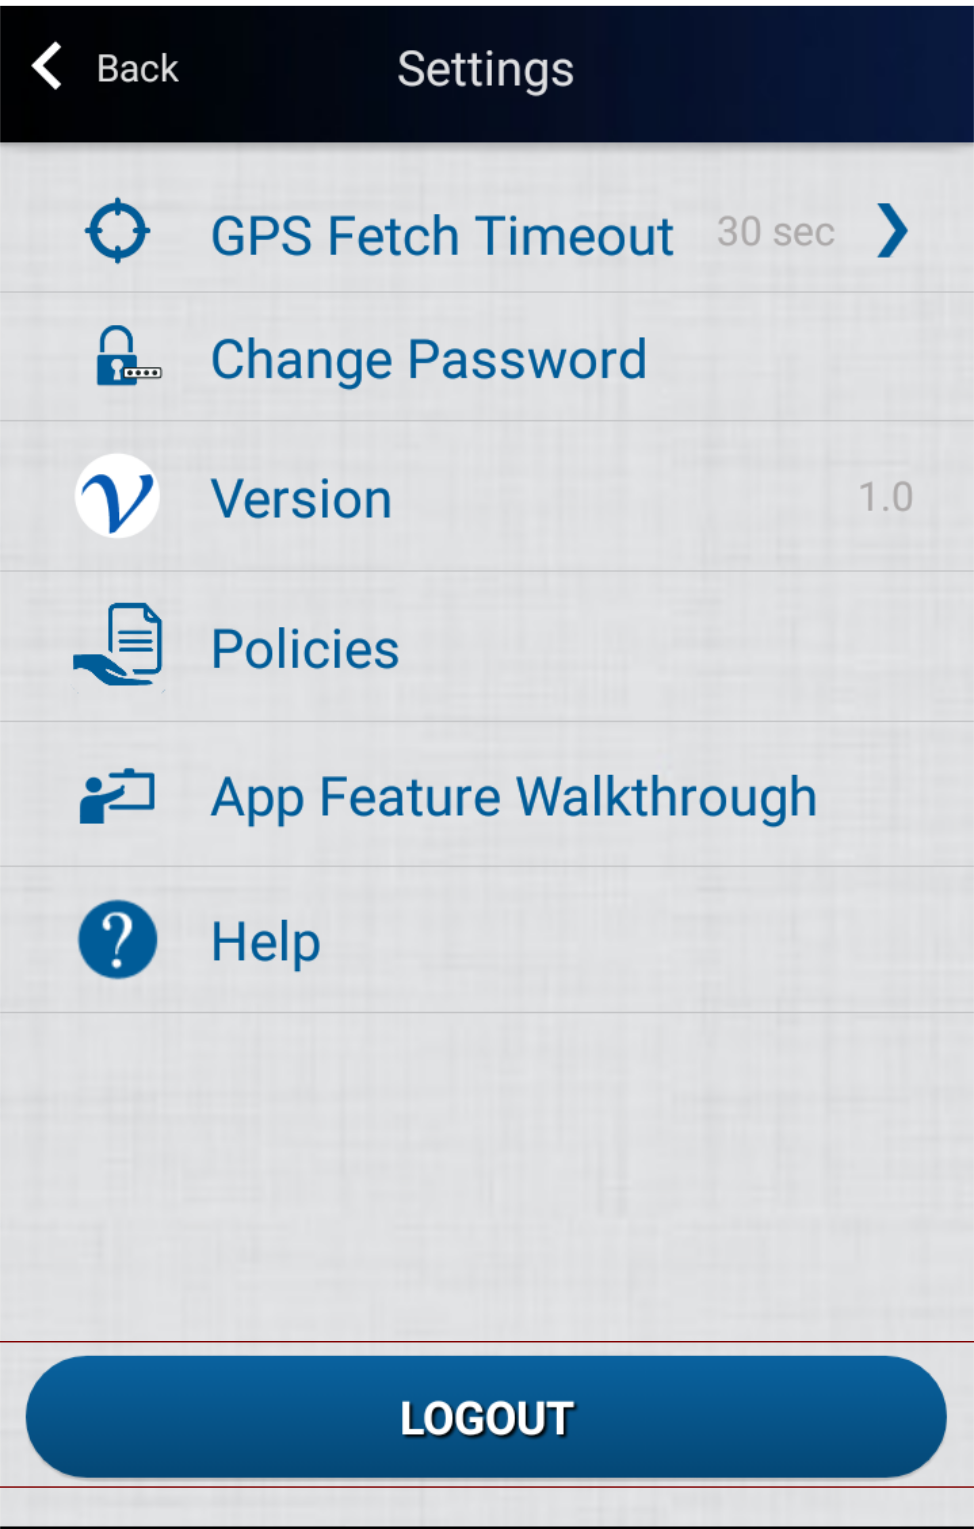
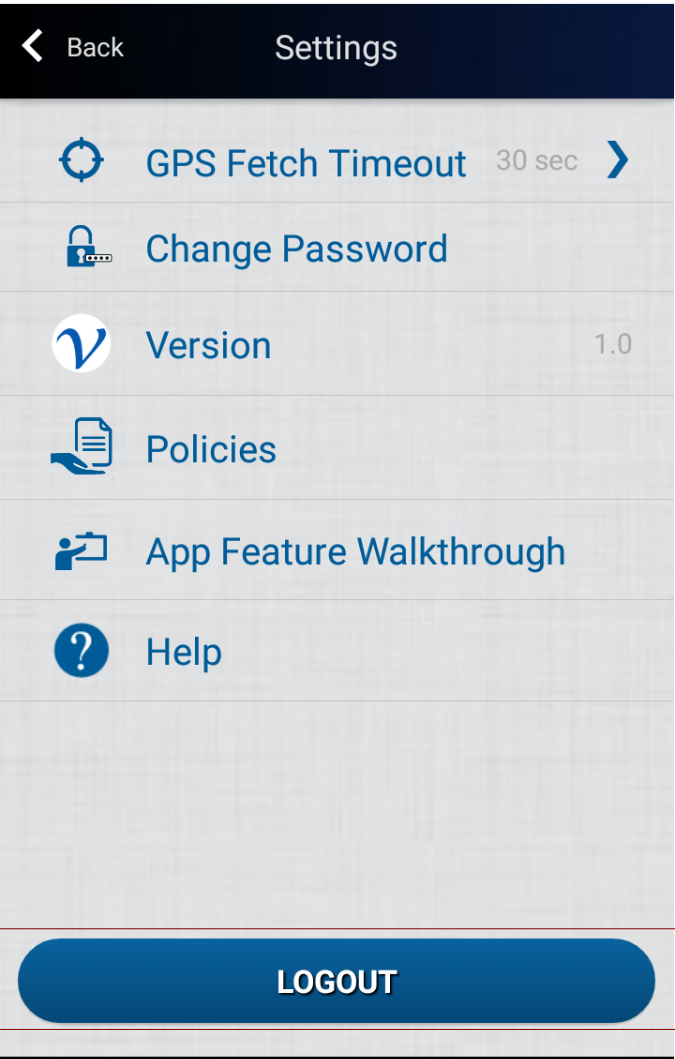
The Settings screen opens where you can view the following settings.
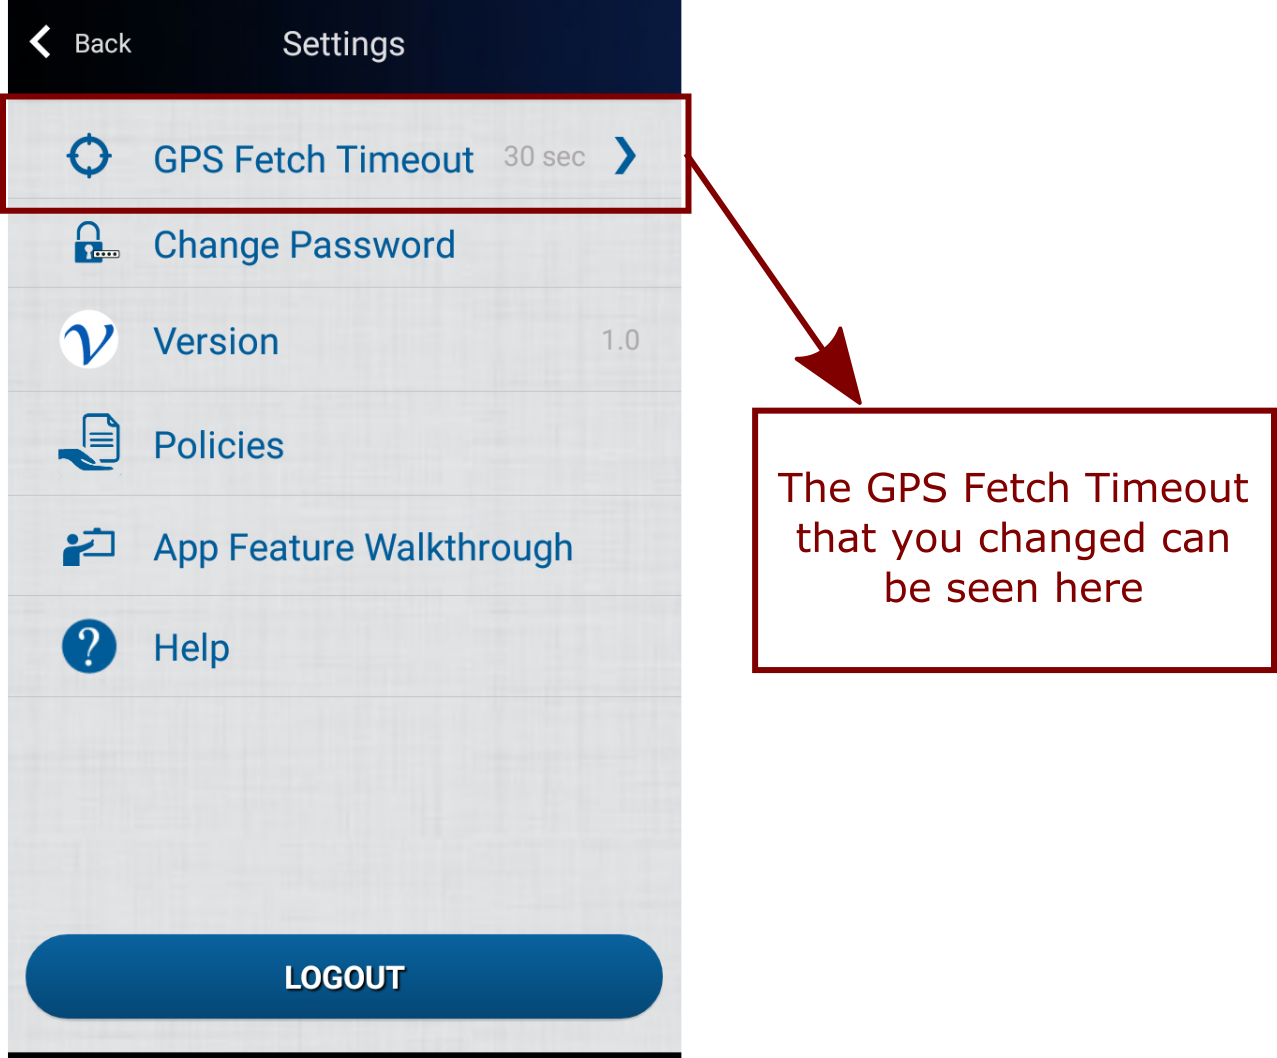
GPS FETCH TIMEOUT
From here, you can select the time for your GPS to automatically refresh your location. Here you have four options, one of which can be selected according to your preference. The options are:
- 30 sec
- 60 sec
- 90 sec
- 120 sec
You can change your GPS Fetch Timeout from here. Once you tap on one of the options, it takes you back to the settings main screen and your GPS Fetch Timeout has been changed as shown in the figure below.
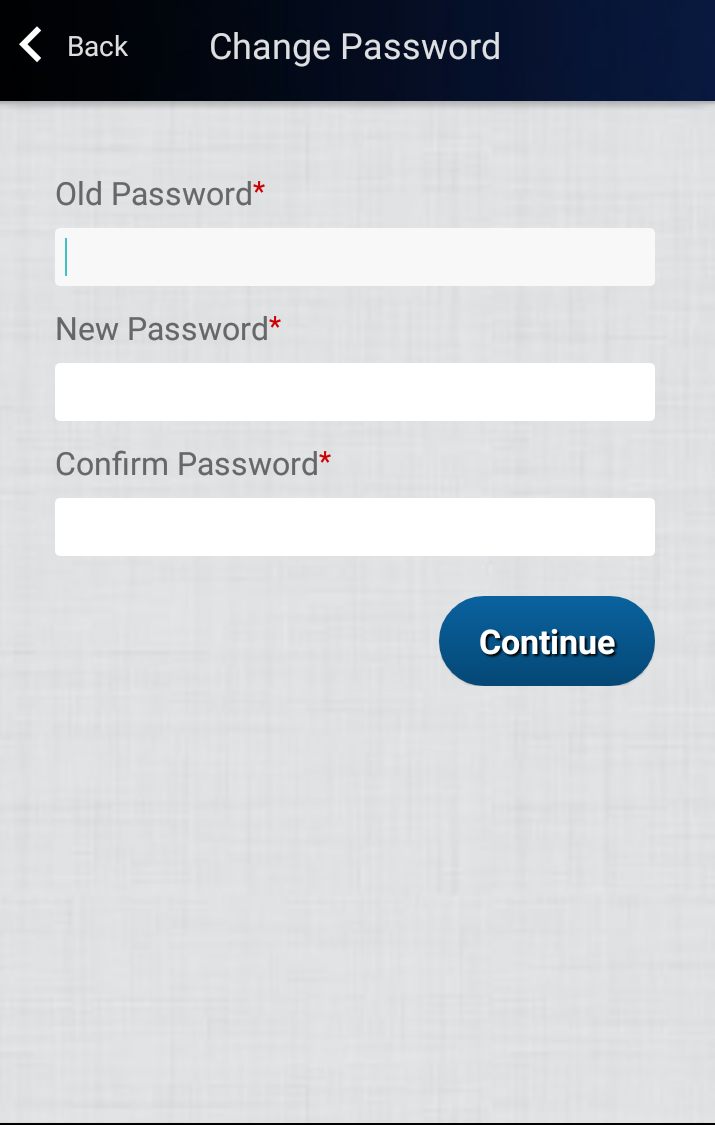
CHANGE PASSWORD
When you tap on the change password open, you are redirected to a new screen where you can change the password of your account. Here you can see three fields which are all mandatory. Enter your old password and new password that you want to change. For the new password, you also need to confirm your password before hitting the continue button.
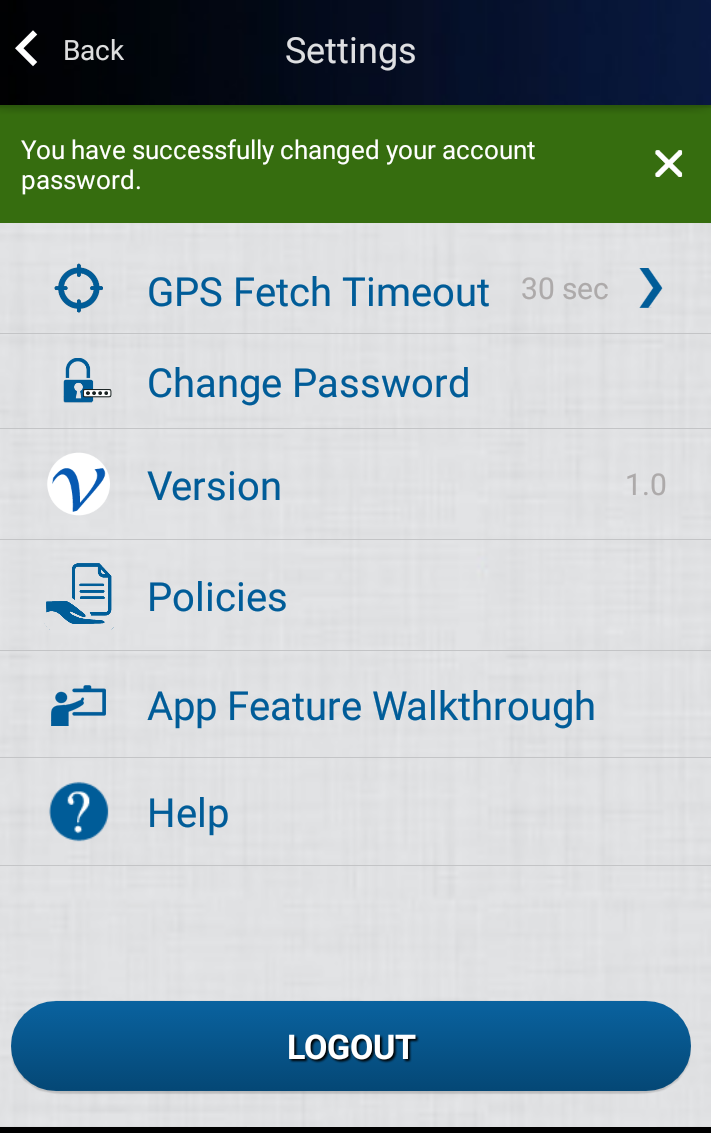
Once you have clicked on the continue button, it redirects you back to the Settings screen where an alert is generated that you have successfully changed your password as shown in the figure below.
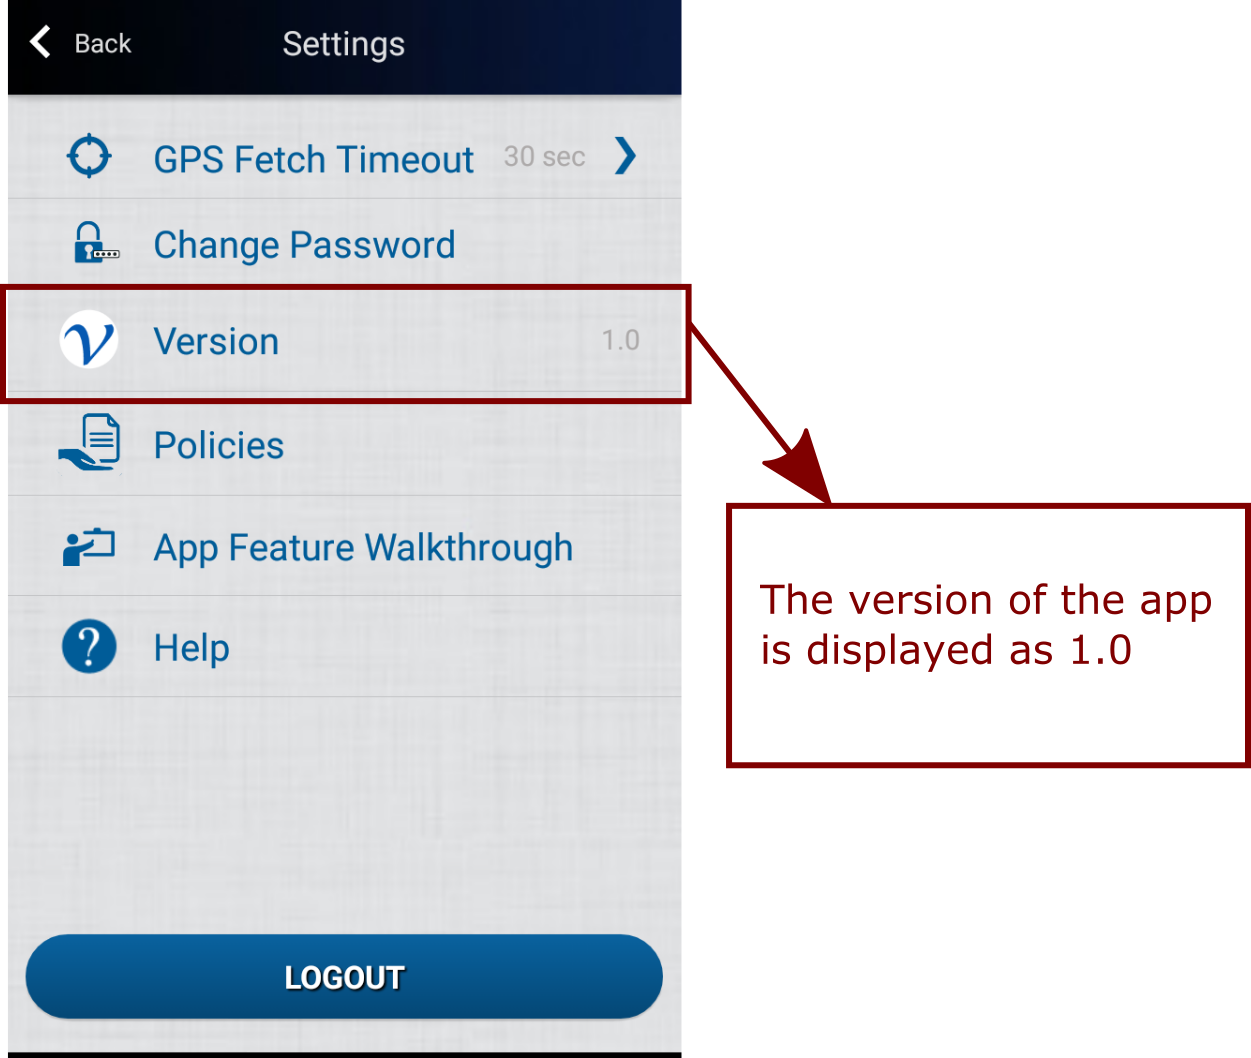
VERSION
When you come across the Settings screen, the third option is the version of the app. Here you can see which version of the app you are running. As you can see in the figure below, currently the version of MyGlobal Rescue app is 1.0.
POLICIES
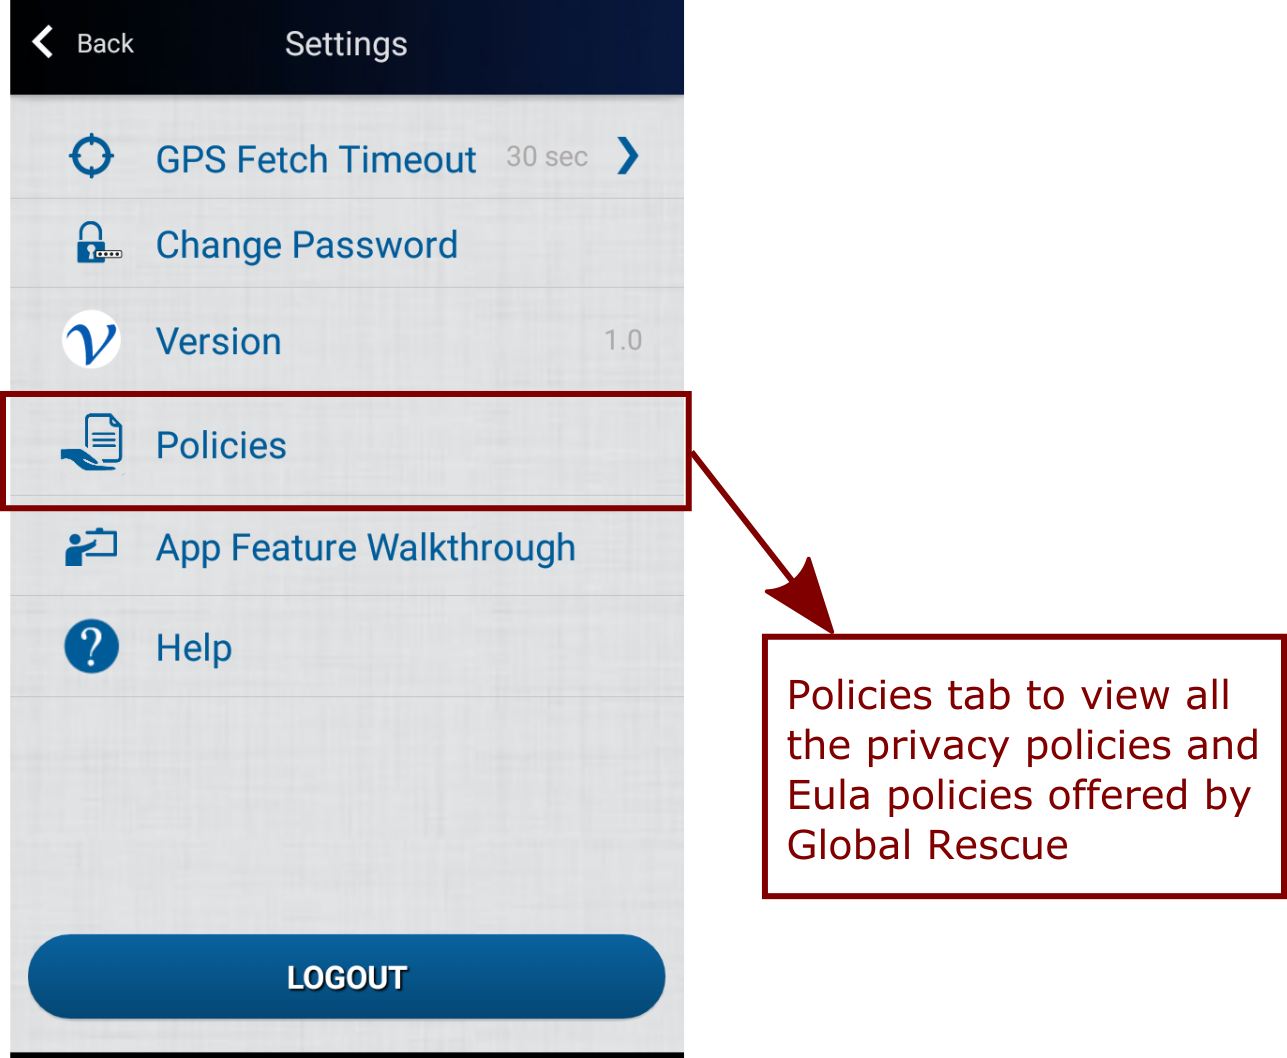
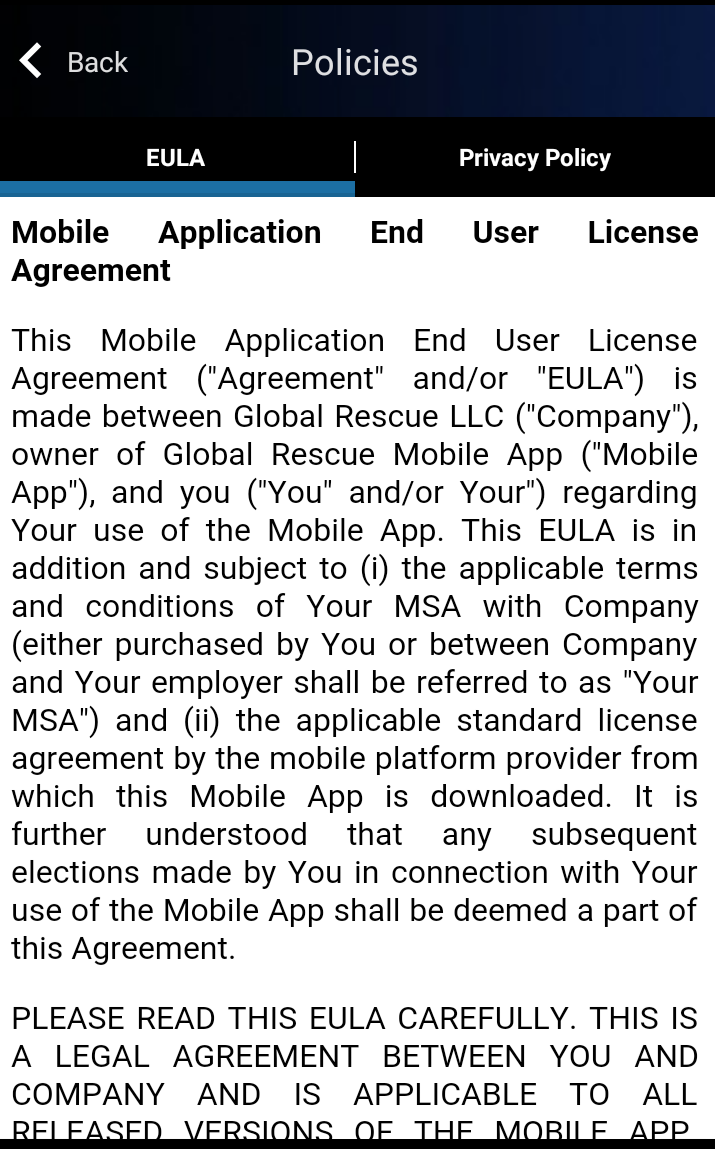
In this tab, you can view a detailed version of the two very important policies that we offer. You can read them at your leisure here. When you tap on the policies option, you are taken to a screen where the Eula Policy and Privacy Policy both are available for you to read.
To go back to main settings screen, you can click on the back button and it will take you back to the main settings screen.

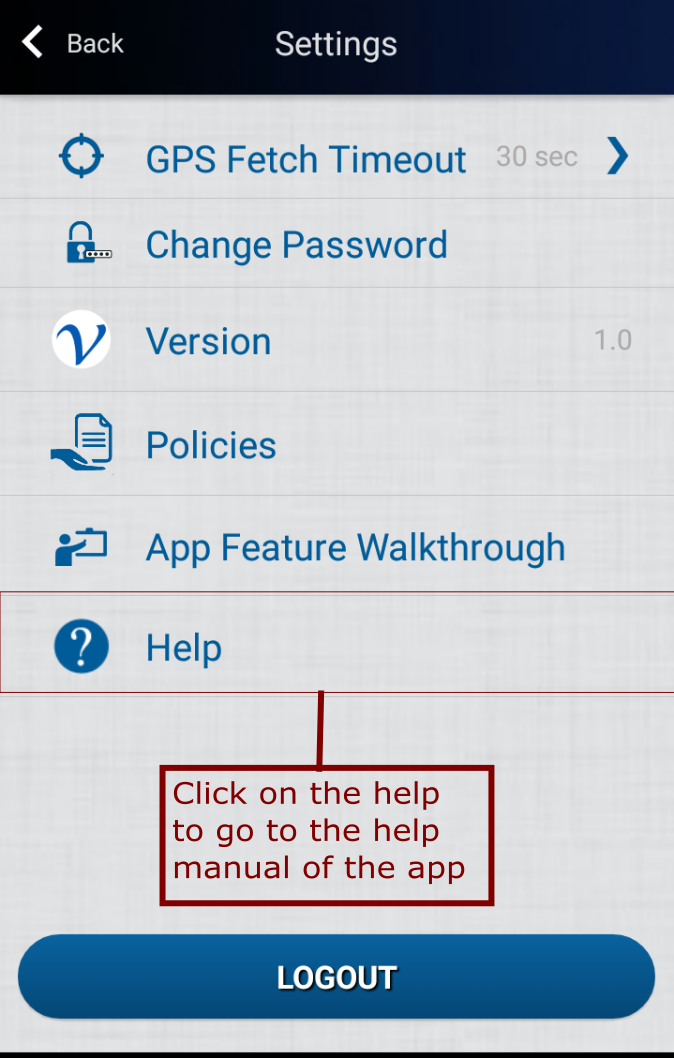
The help option takes to the help manual of the MyGlobalRescue app. Here you can find all the help that you need to get familiar with the app. You can visit the help pages back tapping on the help in the settings menu. It will redirect you directly to the help pages.
To log out of your account, click on the side menu to go to the settings panels. At the bottom of the screen, there is a blue button as shown in the figure click. On clicking the blue button, you will be logged out of your account.